A module can have two views: one on the back office and one on the front office. The front office view is how and where the module is displayed within your shop’s theme.
To change the positions of a module and insert it in a different hook on your theme, you must follow these steps:
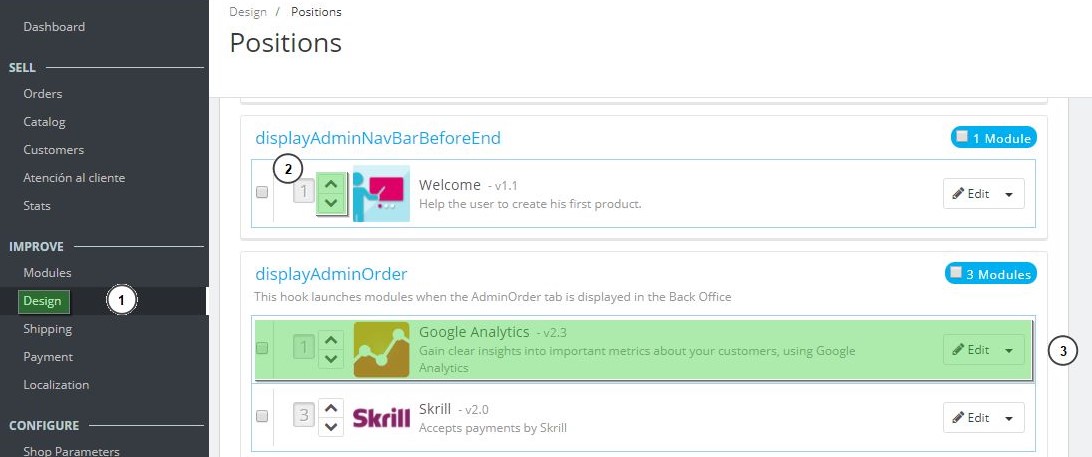
- Go to Design (1) > Positions. You will see all the available hooks, as well as all the modules attached to them.
NOTE : Each hook corresponds to a certain position of the front-office of your store. Inside of it you can see the connected modules in the order in which they are shown. In the header of each hook is shown its name and the number of modules connected.
Moving a module within a hook
- Option 1: Click the up or down arrow. The page will reload and display the new order.
- Drag and drop the module’s row itself:
- Place the mouse cursor on the position number to have it change into a “move item” cursor.
- Click and hold while moving the cursor over the row/position where you want the module to be: the module’s row changes position accordingly.
- Release the mouse button: the current position for the module is saved.
Attaching a module to a hook: Transplanting
In PrestaShop, “transplanting” is the action of attaching a module to a hook. You can add a module to more than one hook.
NOTE: Two things to know before transplanting a module:
- Some modules are written to only be attached to a given set of hooks.
- Some hooks are written to not accept some specific kinds of modules.
-
-
- In the “Module” drop-down list, select the module you want to transplant (1).
- In the “Transplant to” drop-down list, select where you want to transplant the module to (2). There are many hooks available. You can change your settings later if needed.
- In the “Exceptions” field, type the name of the file(s) of the pages in which you do not want the module to appear (3)
You can perform multiple selections simply by clicking on the file names while keeping the Ctrl key pressed. You can deselect files in the same manner: Ctrl+click. - Do not forget to save your changes (4).
- Click “Transplant a module” (1).
IMPORTANTE: If the changes are not visible, remember to clear the cache.
-


 Contact


