


 Contact

If you have a PrestaShop online store and you want to increase your sales by creating a shop on Facebook, we tell you how to do it in this article.
Requirements for synchronising your Online PrestaShop store with Facebook
- Have a Facebook page with the Shop option activated. Click here to find out how to do this.
- Have an account on PrestaShop. If you don’t have one, you can create one here.
- Have an account on Business Manager. To create it, click here
- The page you want to synchronise must be in the Business Manager you are going to use.
- You must have the PrestaShop Facebook module installed in your PrestaShop online store
Installation and configuration of the PrestaShop Facebook module
In order to synchronise the products from your online store with the Facebook social network, you need to install the PrestaShop Facebook module. We show you the steps required to do this below.
- Install the PrestaShop Facebook module
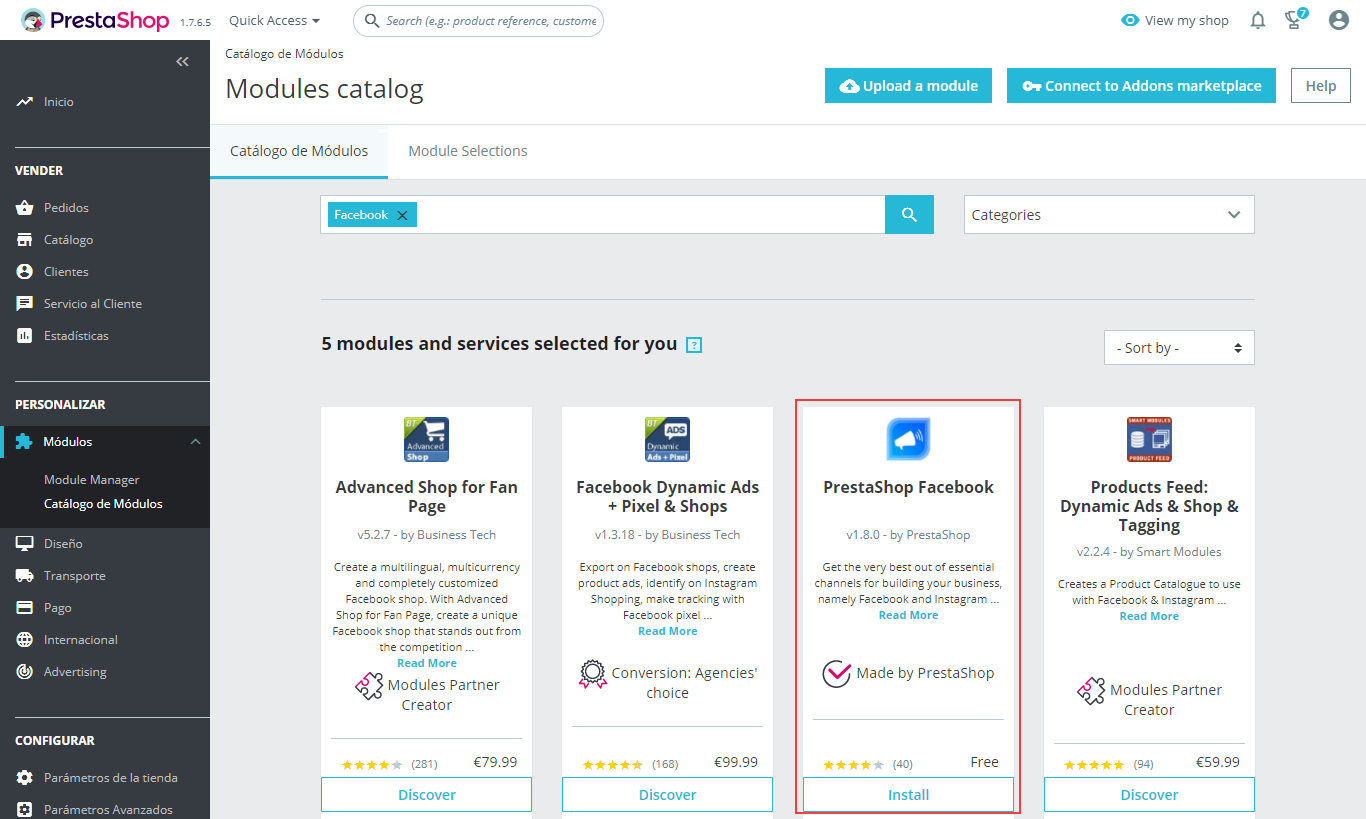
On the control panel of your online store, go to Modules > Modules Catalogue.

Search for the module using the search tool. Find it easily using the word ‘Facebook’ and install the module.
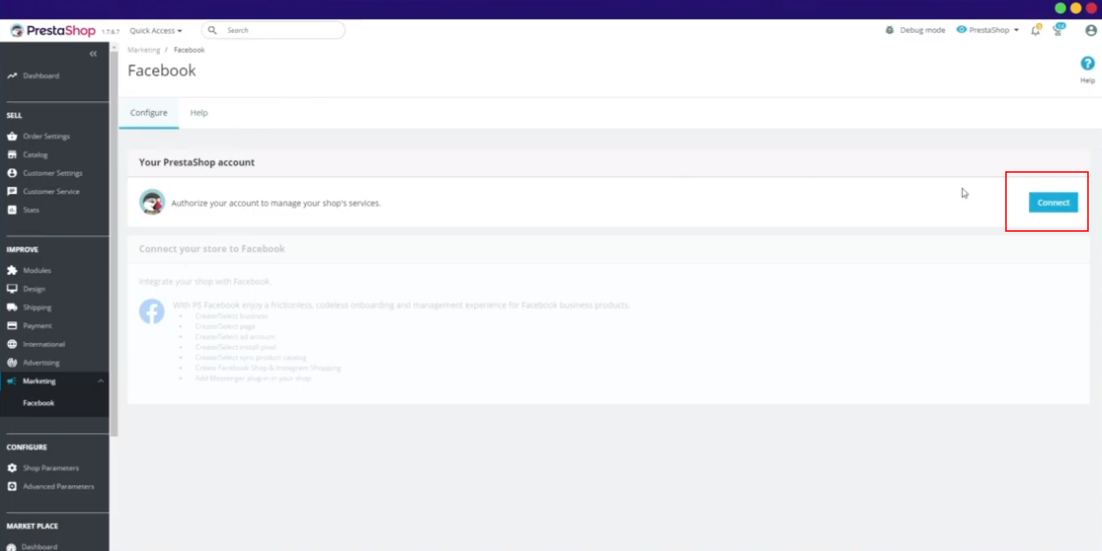
Once installed, go to Modules and click on Configure. You can also find it on the left hand menu in Marketing > Facebook.

- Connect your PrestaShop account to your Facebook account
To do this in the module, click on Connect. If you already have a PrestaShop account, log in with your username and password. If you don’t have one, you will need to create one.
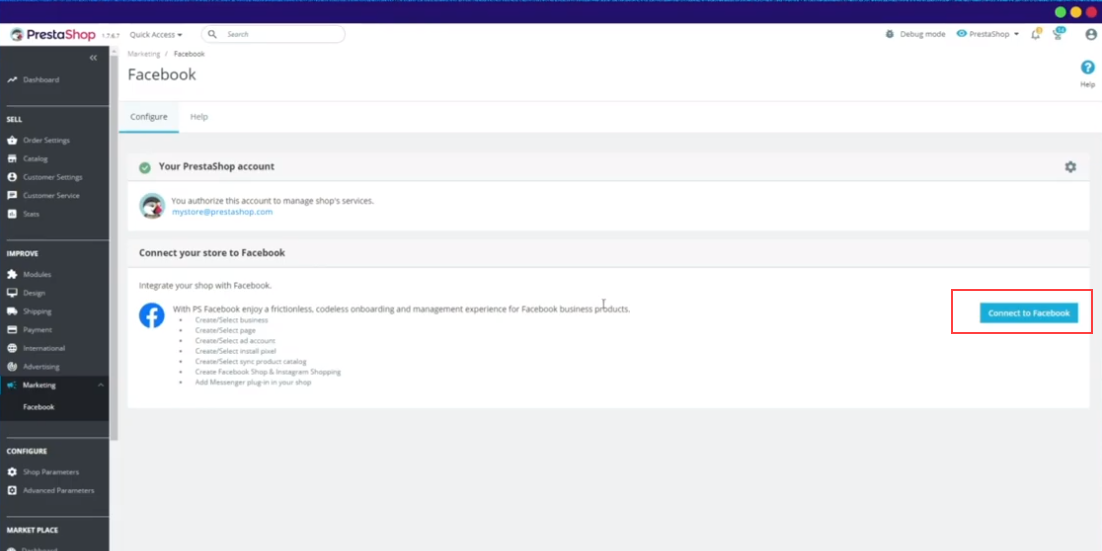
Next, connect your Facebook account from the same configuration of the module. Click on Connect to Facebook to select the account you want to connect to.
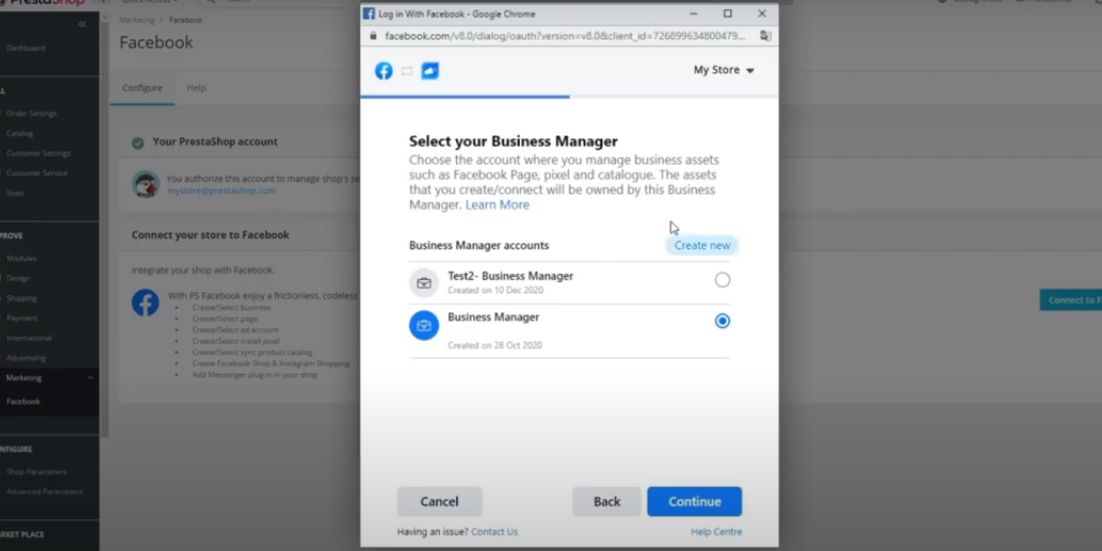
Facebook automatically detects your Business Manager accounts from where Facebook Pixel, adverts and your catalog are managed. Choose the Business Manager account that contains the Facebook page on which you want to publish your catalog.
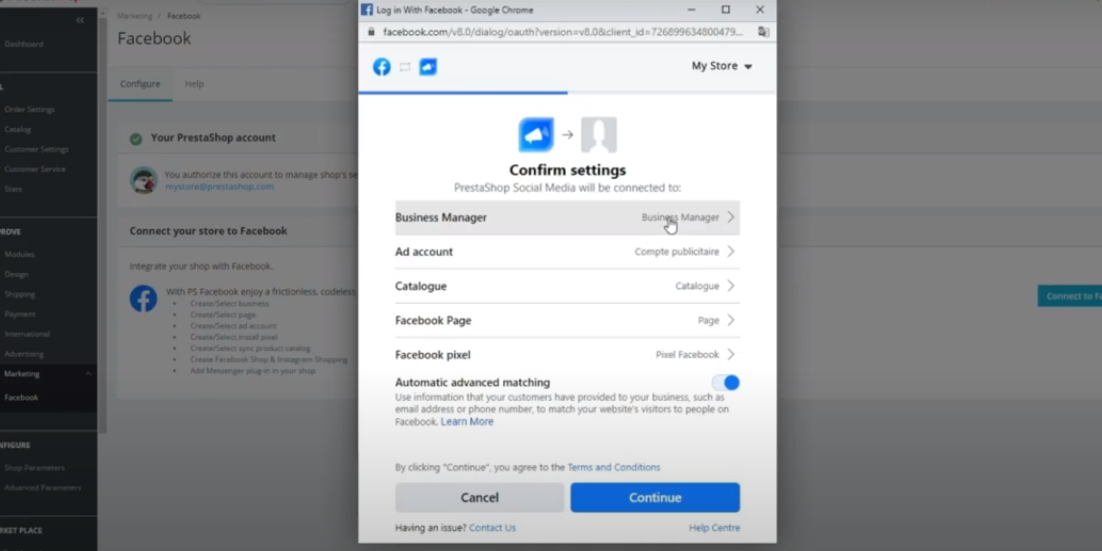
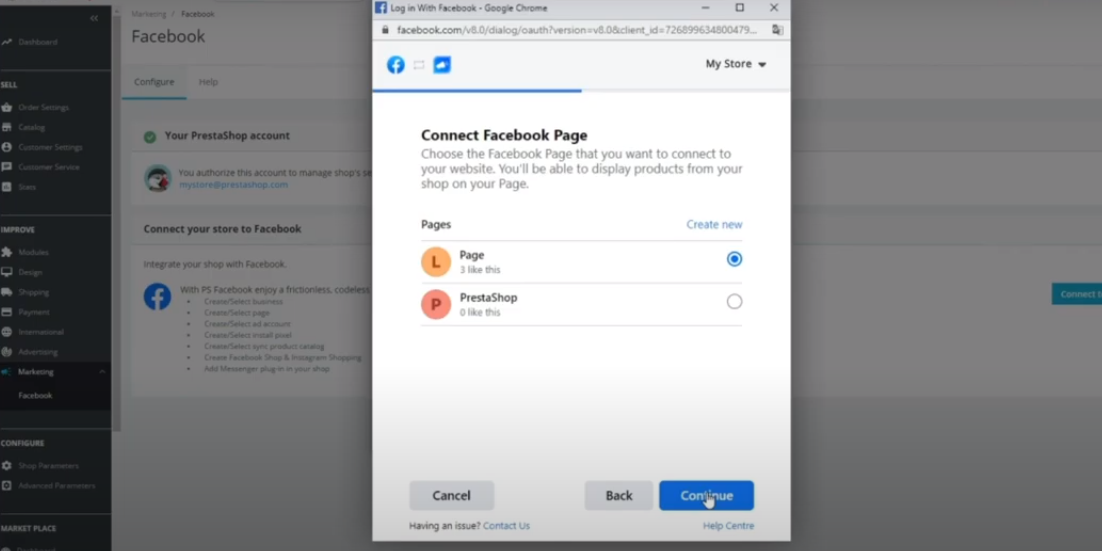
Then choose the Facebook page on which you want to publish your catalogue.
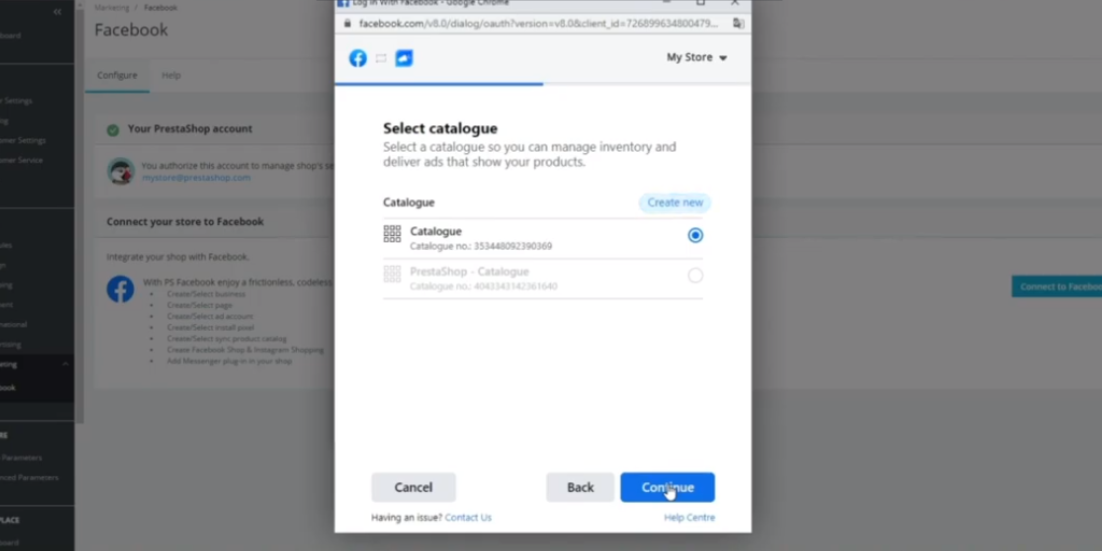
To finish, select the catalogue you want to display to your customers on Facebook. If you don’t have one, click on Create Catalogue.
In the next steps, you will also be able to choose your advertising account and the Facebook pixel tracking that you have installed (that way you will also be able to manage your Facebook adverts).
- Export your entire catalogue to the Facebook catalogue
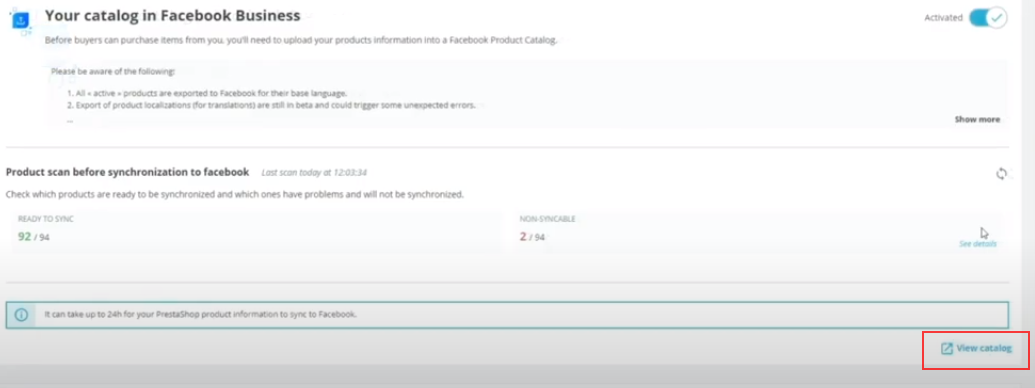
You can now export your catalogue to Facebook from the Product Catalogue tab. On this PrestaShop screen, Facebook automatically detects the products that are available to synchronise and those that have errors, to be able to resolve them.
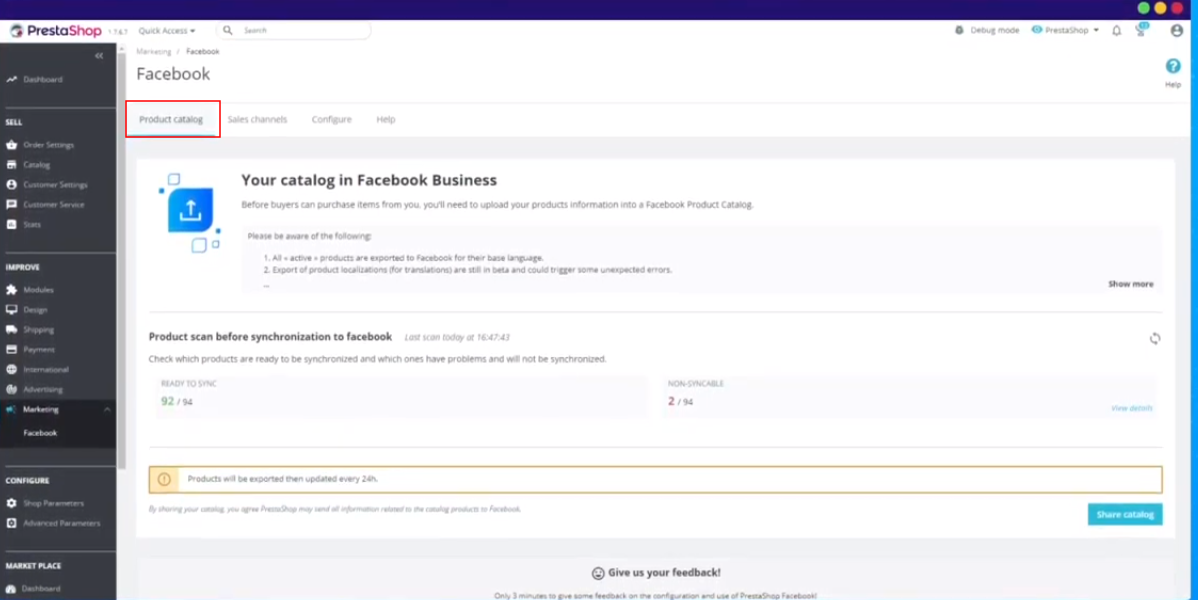
Once you have exported the catalogue to Facebook, you will be able to view it in 24 hours by clicking on View Catalog.
The catalogue of your PrestaShop online store is now published on your Facebook page. If you need more information you can watch the following video tutorial from PrestaShop.
If you want to find out how to synchronise your PrestaShop online store with the products from BigBuy, don’t miss the following article.