


 Contact

The organisation and presentation of products are essential aspects in attracting customers and increasing sales. This is where Shopify’s collections play a key role. In this guide, we will explain everything you need to know about Shopify’s collections and how they can benefit your store.
Before delving into the details, it is vital that you understand the difference between a manual collection and an automated collection. Both options allow you to group products in an organised way, but their focus and method of creation differ significantly.
1. Manual Collection: Your Personal touch
Manual collections are created and managed directly by you, so they give you complete control over which products are included in each of them. This option is ideal when you want to carefully select a small number of specific products. Imagine you have a product category with a special theme, such as “Summer Offers”. In this case, a manual collection will enable you to only display the most relevant and attractive items for your customers.
2. Automated Collection: Simplify management
Automated collections are organised automatically by Shopify according to the criteria and conditions you set. These collections update automatically when products are added or removed in the store, enabling you to save time and work on managing things manually.
Automated collections are ideal when you have a wide variety of products and you want to categorise them automatically according to certain attributes, like tags, prices, inventory, among others.
3. How to create a new collection
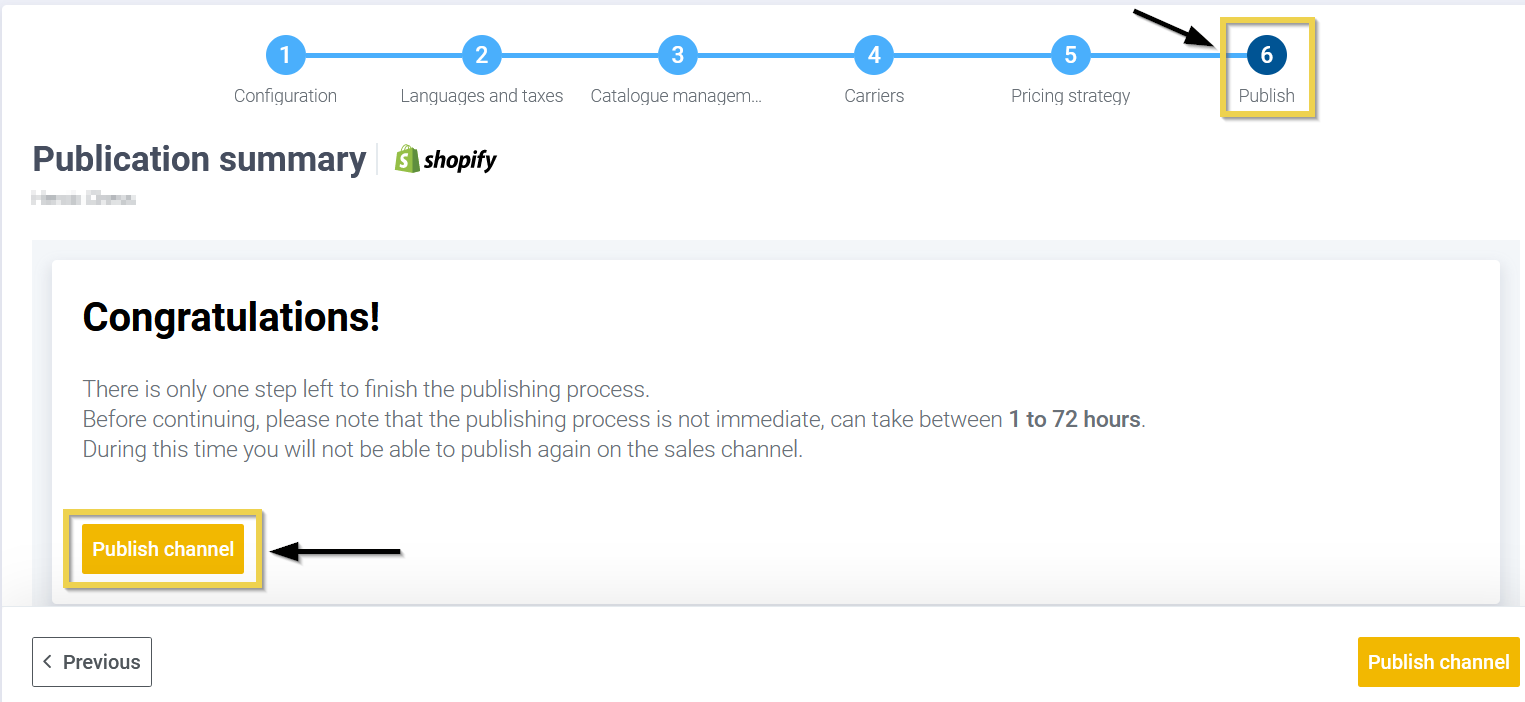
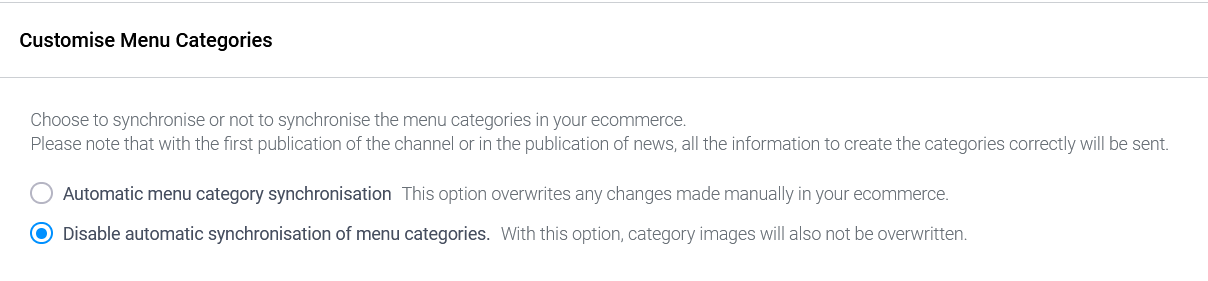
Before creating a new collection on Shopify, it is important to activate the option Disable automatic synchronisation of menu categories (within Customise menu categories in additional configuration in Catalogue Management) on the Multichannel and make a new listing.
By doing so, you will prevent the system from overwriting any changes made to the collections in your store.

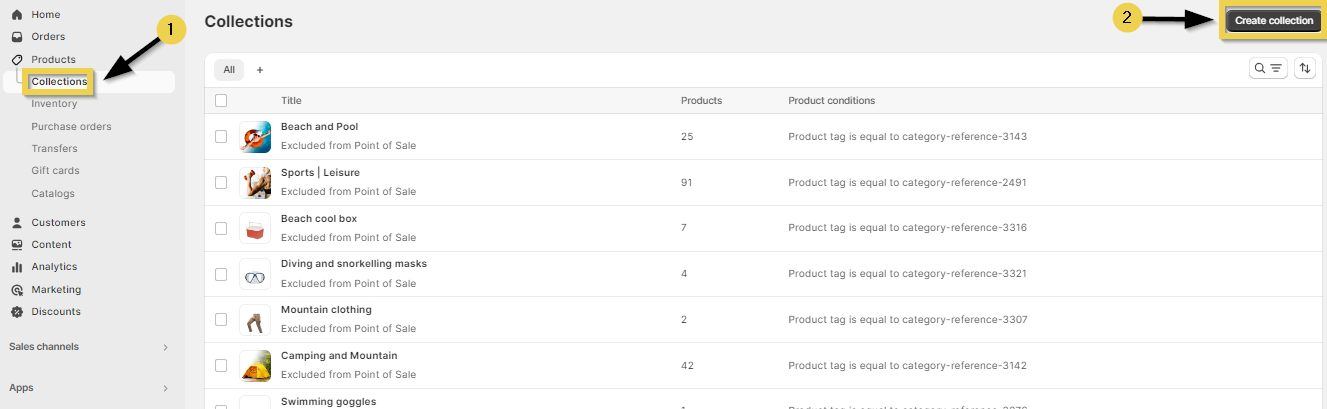
Once the Multichannel listing process is complete, enter your Shopify store and click on the Collections tab in the browsing menu.
Then click on Create collection.
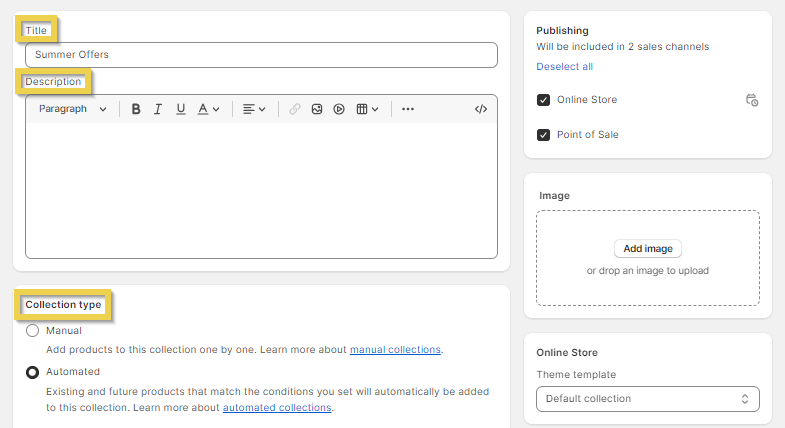
Configure the details of the collection:
- Name of the collection.
- Description (optional).
- Type of collection: Choose between Manual or Automated, according to your needs and preferences.
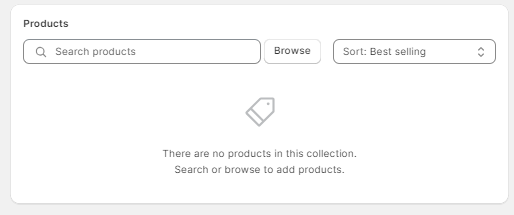
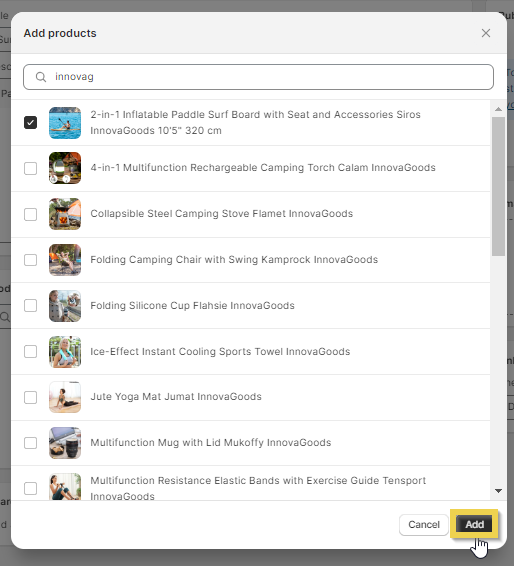
If you have chosen to create a manual collection, you will be able to add specific products from the Available products section.
To add products, search for those you want to include and click on the Add button.
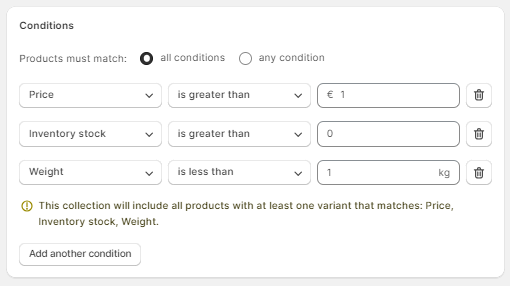
If you opt for an automated collection, you will have to set filter criteria so that Shopify automatically selects the products that meet these requirements. You can configure up to 60 conditions according to categories, tags, prices, availability and other attributes.
Don’t forget to click on the Save button once you have completed the configuration of your collection.
In both manual and automated collections, it is possible to sort products however you prefer. That means you can further customise your collections, highlight certain products and offer your customers a better shopping experience.

4. Add a product to a manual collection from the product sheet
It is also possible to add a product to a collection from the product sheet. This isn’t just possible for manual collections.
To do so, go to Products on the side menu and open the product you wish to add to a manual collection.
In the Collections section within the product sheet, select the collection you want to include the product in and click on Save.
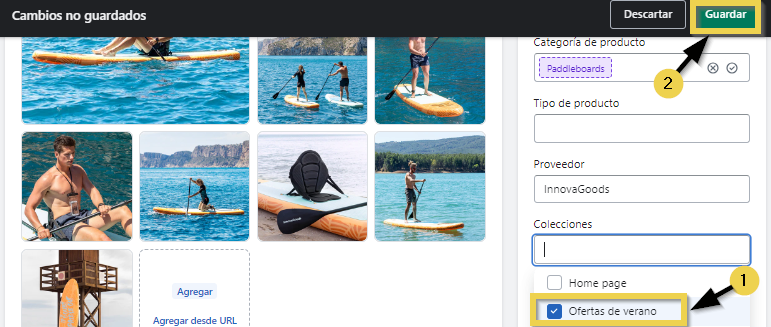
The product will now be in the selected collection.
5. Hide BigBuy’s collections
Each product offered is linked to one or several specific BigBuy categories. These collections are displayed automatically in your store when you import the products. If, at any time, you decide to remove our collections, it is important to bear in mind that they will appear again automatically. For that reason, we recommend you hide them instead of removing them, following the instructions below.
Before hiding the collections, don’t forget to activate the option Disable automatic synchronisation of menu categories (within Customise menu categories in additional configuration in Catalogue Management) in the Multichannel and create a new listing to save the changes.
By doing so, you will prevent the system from overwriting any change made in the collections in your store.

Once the listing process is complete, you will be able to hide the collections that you do not want to be displayed in your store.
To do so, follow these instructions:
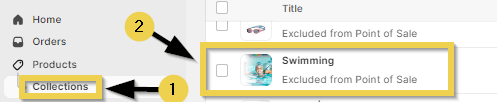
On the Shopify dashboard, click on Collections, within Products, and select the collection you wish to manage.
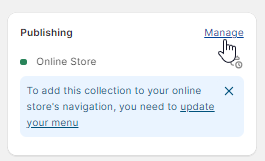
By clicking on Manage, you will see the list of sales channels available; uncheck the ones you want to hide the collection from, so it won’t be visible.
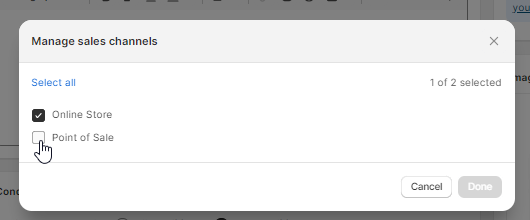
Click on Done to save changes.
Finally, make sure you save the changes you make by clicking on Save.
We also recommend that you check out our Help Center about creating tags on Shopify. Tags are a powerful tool to complement the creation of new collections. They can help you to improve customer browsing, optimise product management and personalise the shopping experience.