


 Contact

In this article, we will explain how to synchronize your ManoMano account using the Multi-Channel Integration Platform (MIP). To do this, you must have an approved seller account on ManoMano.
Once your account is authorized, go to your BigBuy control panel and navigate to Multi-Channel > Marketplaces to start the synchronization.
1. General considerations before enabling the ManoMano connector for a client
- The client must have an active ManoMano Seller account.
- You must obtain from the client:
- Seller Contact ID (provided by ManoMano, varies by country).
- API Key for the connection.
In MIP, the seller must enter both fields in the ManoMano connector configuration section.
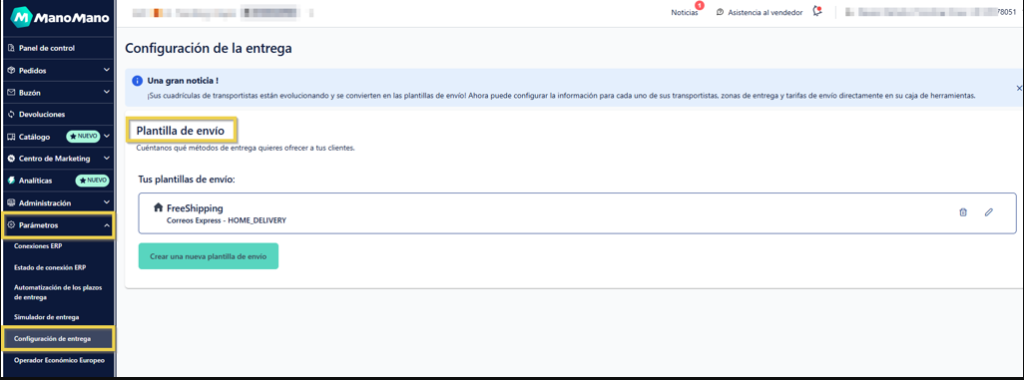
2. Shipping Rules Configuration (ManoMano Toolbox)
You must upload the file Feed ManoMano.xlsx, which contains the shipping rules previously configured in the Toolbox.
1 – Shipping template:
- Excel file where transportation rules are assigned under the “Carrier Grid” column.
- The number of columns must match the number of templates created in ManoMano.
- If the client works with a single carrier, only one template is required.
Access the Toolbox → https://toolbox.manomano.com
Side menu: Parameters → Delivery Settings → Shipping Templates
2 – Create one or multiple shipping templates
Example:
- FreeShipping – GLS_HOME_DELIVERY
- Standard – BRT
- If only one carrier is used, a single template is enough.
- Each template defines country, cost, and delivery time.
Steps:
- Download the base file Feed ManoMano.xlsx
- Fill in template names in the “Carrier Grid” column
- Save the updated file
3. Automated Catalog Configuration (automatic import)
The automatic catalog import is performed directly from the ManoMano Toolbox:
Catalog → Automatic Import
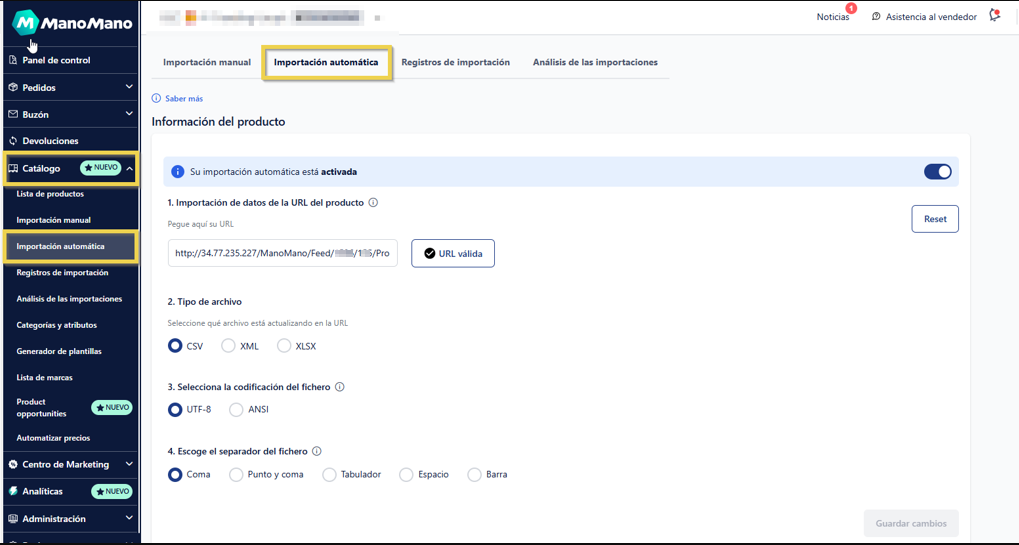
a) Product information
- Insert the Feed URL in the field “Import product data from URL” and click Validate
→ You can fin the feed in your MIP:
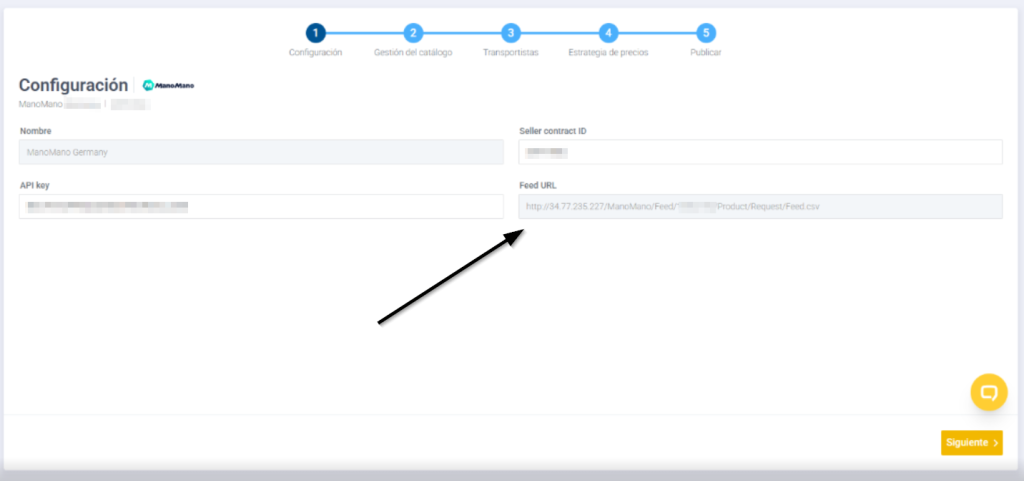
In ManoMano backoffice:
- File type → CSV
- Encoding → UTF-8
- Separator → Comma (,)
- Click Save changes
If the link is correct, a message will appear: “Valid URL”.
b) Offer information (prices and stock)
- Use the same Feed link.
- Enable “Replace the entire catalog with this new version (add and update)”.
- Click Save changes.
Two automatic records will be created: one for Products and another for Offers.
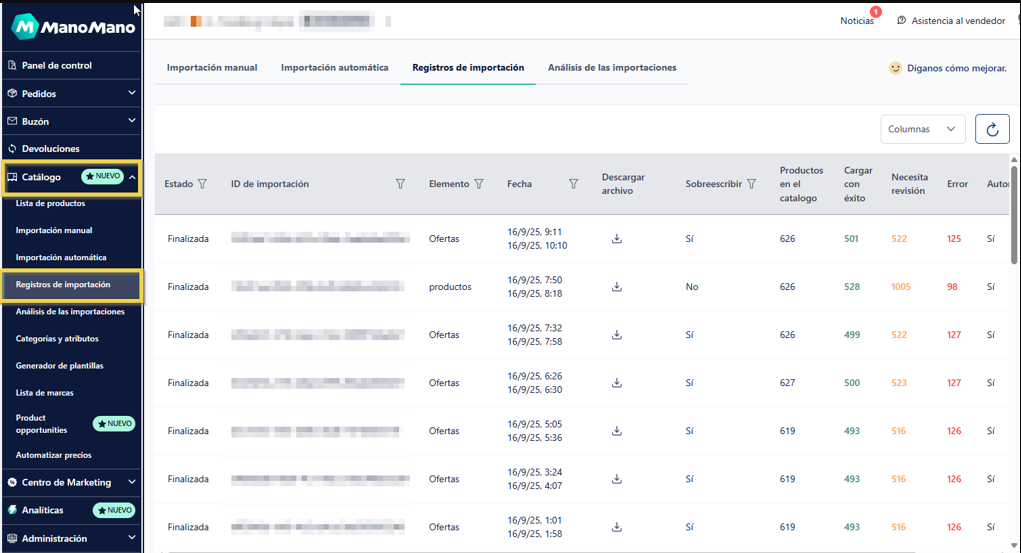
c) Processing status review
Side menu → Catalog → Import logs
In this section you can download feed reports and identify errors.
⚠️ Recommendations
- Enable FreeShipping in MIP if the same option will be used in ManoMano.
- If FreeShipping is not used, the connector is not compatible.
- Name shipping templates by price or weight range.
- Select the main carrier used per region; MIP will automatically update the carrier and tracking link.
- Each country has its own channel ID and different feed.
4. Operational Notes & Troubleshooting
- If multiple carriers are used (e.g., 6), all cells must be filled in the Feed.
- Do not manually modify carrier or shipping time fields.
- MIP automatically updates these columns when adding new products to the catalog.
- ManoMano allows end customers to choose the carrier → each product must include all active carrier options.
- Sellers are assigned a ManoMano onboarding agent to validate initial configuration.
5. Final Validation
- Product feed: Validated by ManoMano.
- Carrier templates: OK (FreeShipping – GLS_HOME_DELIVERY).
- KAM validation: Performed by the ManoMano agent.