Contact

In this article, we offer you a step-by-step explanation of how to configure your Shopify store in various languages and modify translations within the product data sheets.
1. Add languages
1. Add languages
In order to configure a new language, you should first add it to both the Shopify Backoffice and in the channel settings within the MIP.
1.1 Add languages on Shopify
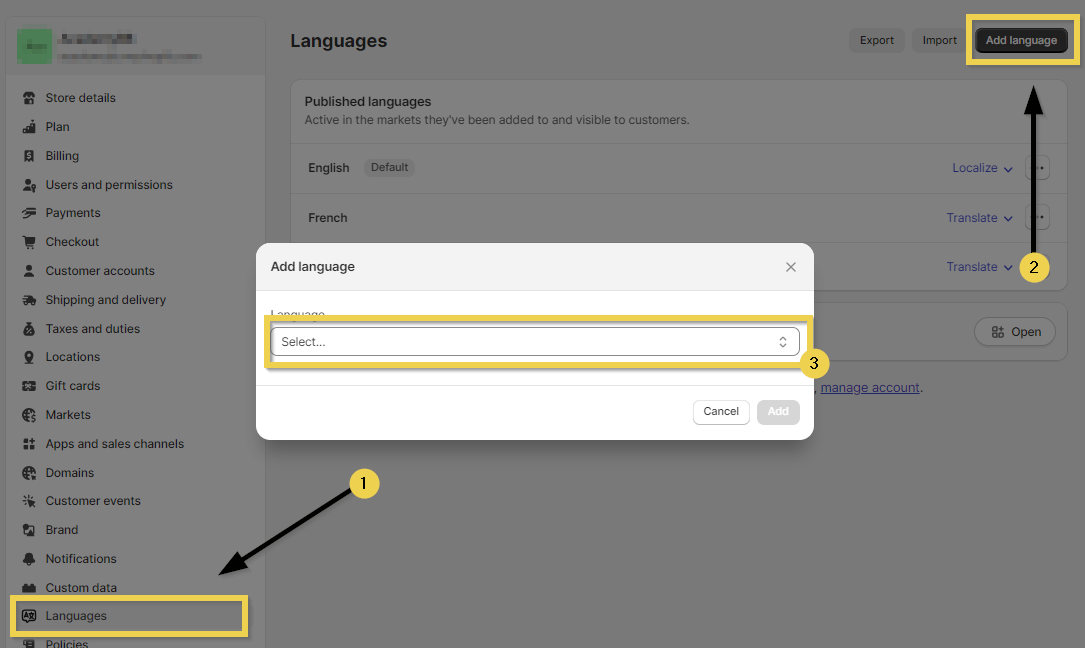
You will be able to add up to 2 additional languages in your Shopify Backoffice by accessing the settings section ![]() and the languages section
and the languages section ![]() , as shown in the image below:
, as shown in the image below:
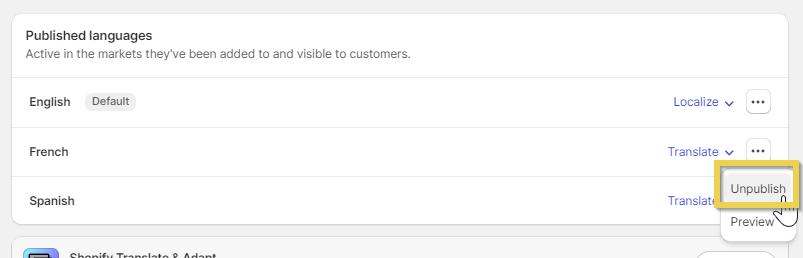
If, at any time, you want to remove a language, you can do so by clicking on the dotted line > unpublish:
1.2. Add languages on the MIP (Multi-Channel Integration Platform)
Here at BigBuy, we offer our catalogue in 24 languages. In the case of 360 stores, you just need to notify us of the language or languages (up to a limit of 3) that you want before the store is created and we will carry out this process for you. If you wish to add them later, you will be able to do so by following the steps described below.
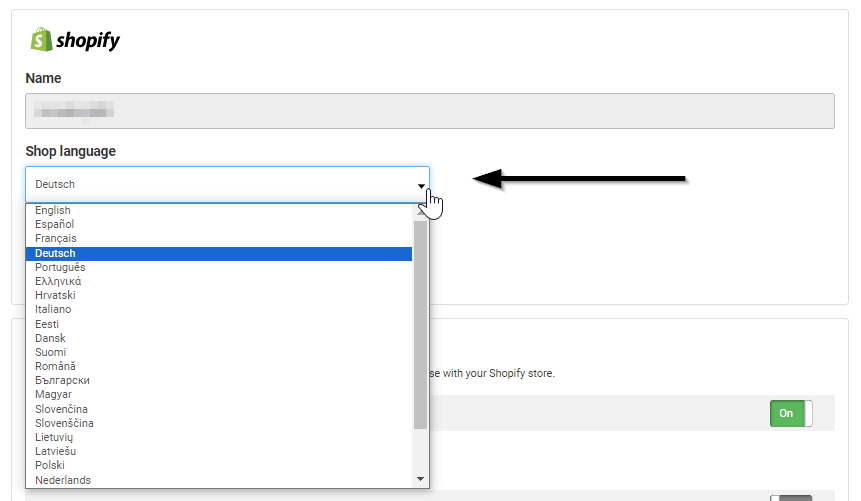
In the case of connectors, you should choose the main language in the first section of the settings.It must match the preset language in your Shopify store before you can continue.
These are the steps to follow in the 360 store and in the connector to add up to 2 additional languages:
- Go to the MIP and click on Configure
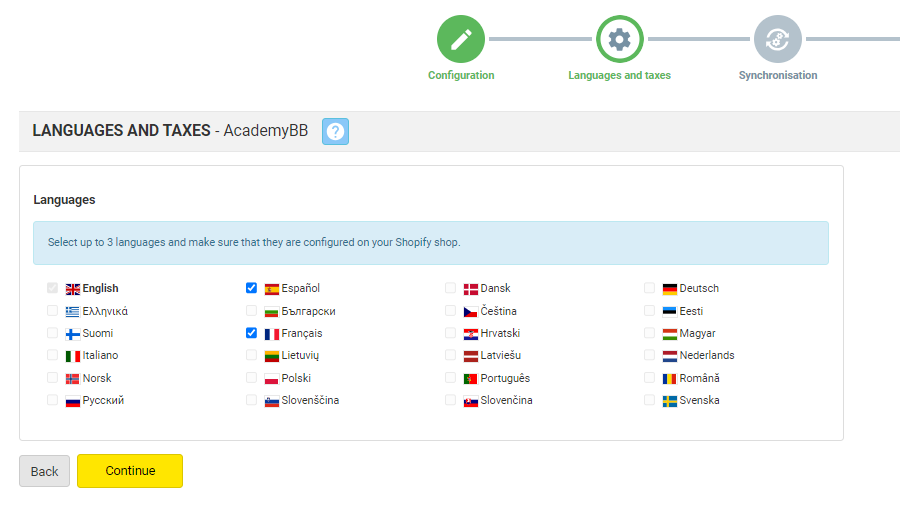
- In the Languages and taxes step, select the languages you wish to publish the catalogue in. Bear in mind that the main language will already be marked by default, so you will be able to select 2 more:
- Go to your Shopify and check that these are the languages configured in the Backoffice.
- Finally, go to the last step and click on Publish so the changes are applied correctly.
2. Install and configure the translation application
Here at BigBuy, we recommend the following free application (and with payment plans): Hextom: Translate My Store.
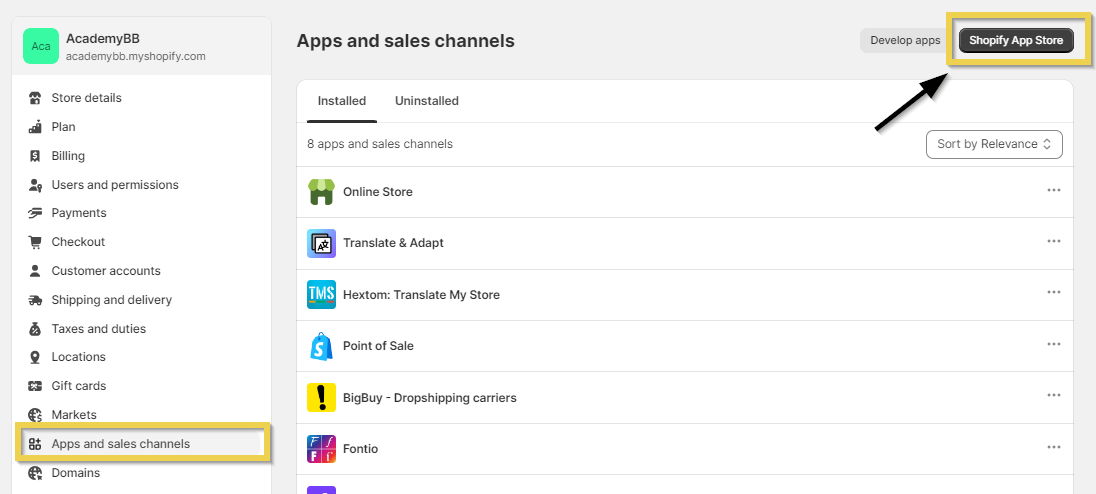
Go to the Applications and sales channels section and then head to the Shopify app store.
Find the recommended application and click on Add App. On the next screen, select Install app and follow the indicated steps for installation.
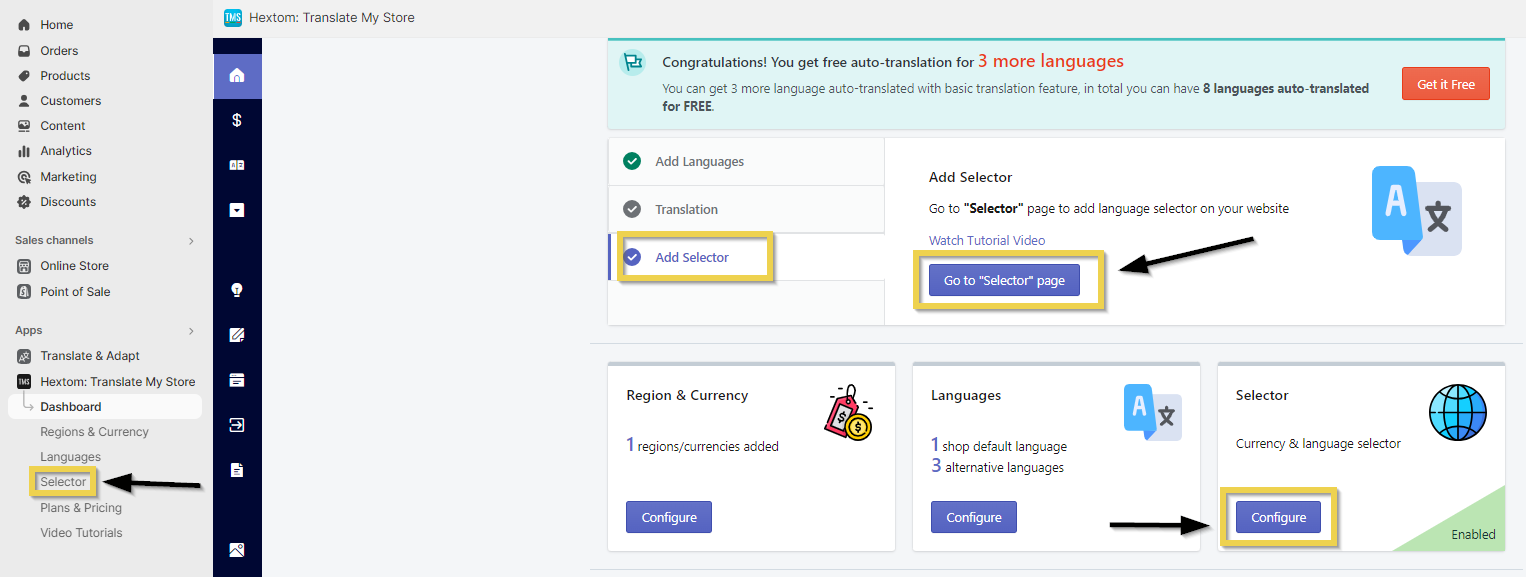
By default, this app scans the store and carries out a machine translation of the languages added in your Shopify Backoffice, and you can jump between them thanks to a selector. To configure it, go to the home screen and access the selector configuration section in any of the following ways.
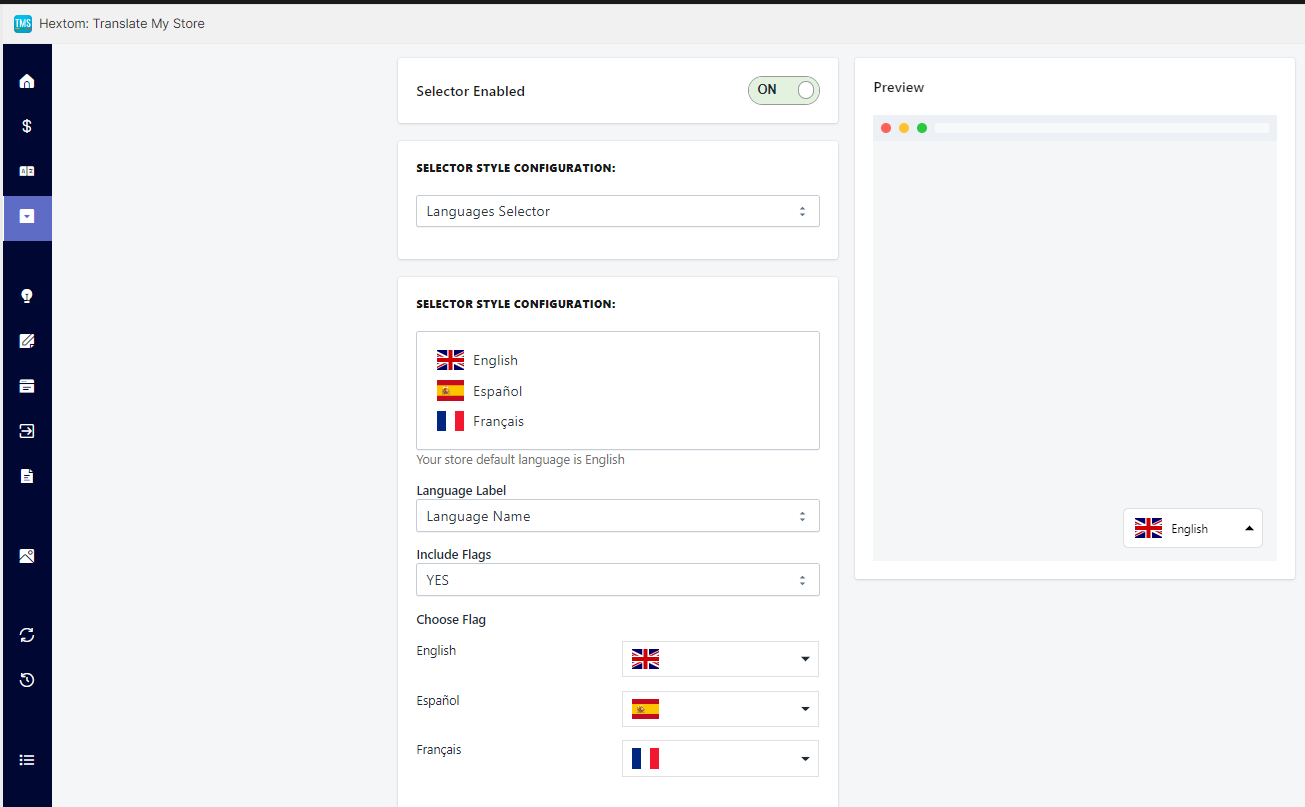
Activate the selector and adjust it according to your preferences (with or without flags, floating, in different parts of the screen, with the name of the language…). On the right-hand side, you will be able to see a preview. Once you are happy with the configuration, save the changes.
3. Make changes to product translations
Before you can modify any text in your store, including translations, you must activate the Customisation of store texts option on your MIP.
You should only deselect the texts you want to modify and publish the change:

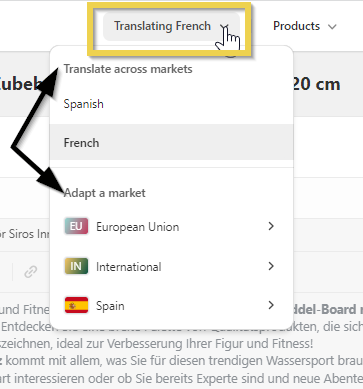
Once the MIP has finished the publication process, you will be able to access the product data sheets in your store and modify the machine translations by clicking on more actions > Localize.
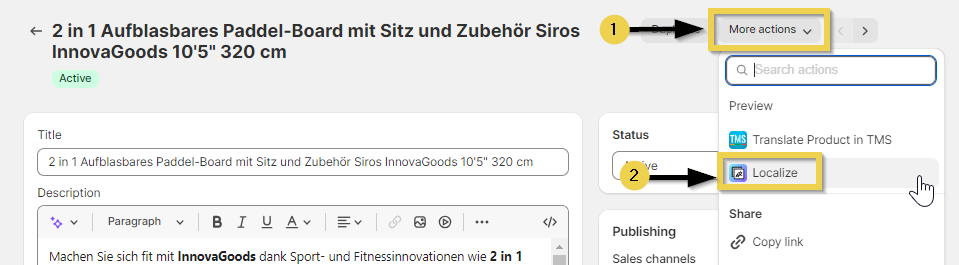
This will directly open the product data sheet within the Translate & Adapt app, where you will be able to make changes to both the description and title.
Additionally, you will be able to decide to apply these changes in all markets or differentiate the translations between European markets, international markets, etc.