


 Contact

In the footer of your blog, several icons linking to social networks are displayed. In this post, we explain how to add/delete them or change their current link.
![]()
To modify them, you need to use your dashboard and from the menu on the left, select Appearance > Customize.
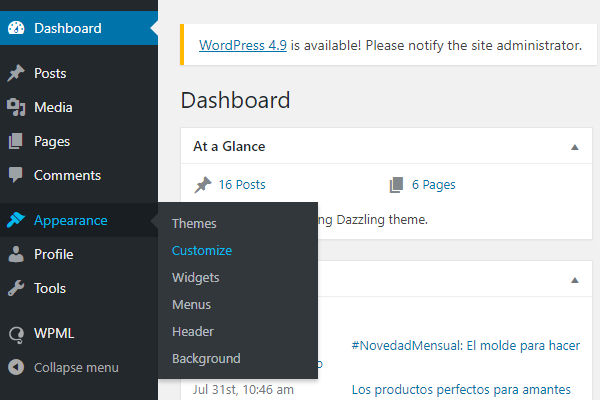
Once in this section, a menu with a preview of your shop will be displayed. Warning! Be very careful with any changes you make in this section. If you modify the wrong section, you can change your blog’s appearance.
Then go to the Menus section.
![]()
Then, enter the “Social links”.
![]()
A menu with the different links that are currently included will be displayed:
![]()
You can change their displayed order by dragging them up or down.
If you want to modify the link for one of them, click on the arrow to the right and a new menu will be displayed:
![]()
In the URL field, you can insert your page’s URL for each social network. Once changed, close this menu and click on the “Publish” button at the top.
If you want to delete this icon, you can do so by clicking on the “Remove” link highlighted in red at the bottom.
How to add the icon again to a social network
If you deleted one of the icons and now want to add it again, you will need to do the following:
Click on the “Add items” button, and a sub-menu will open. In the “Custom links” section you can add the URL of the social network you want to add, as well as your name. Then click “Add to Menu”.
![]()
Finally, click on the “Publish” button.