


 Contact

In this post, we’ll show you how to sync your Shopify store using the Multi-Channel Integration Platform (MIP). To do this, you must have created a Shopify account.
If you don’t have it, you can create one using this link. It is important that you do it from the link above so that we can follow up on your store in case of any incident.
Once you have the online store created, log into your BigBuy control panel and go to the Multi-Channel to synchronize.
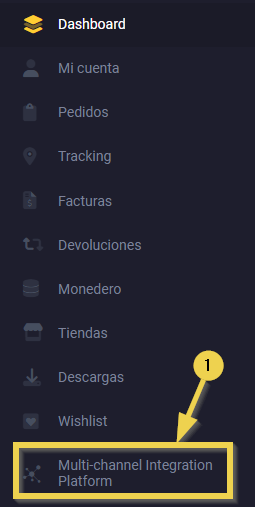
In the left menu, select “Ecommerce platforms” (1), as this is where all E-commerce connectors are located.
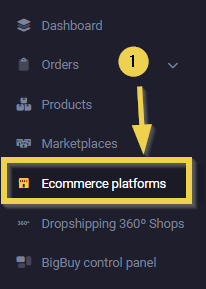
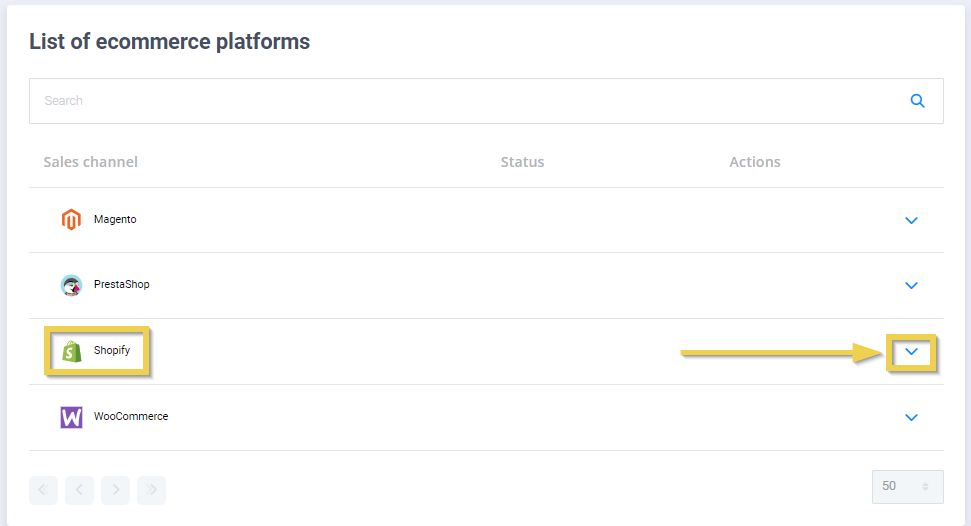
You will find the list of your purchased connectors.
Enter the Shopify connection by clicking on the arrow on the right side.
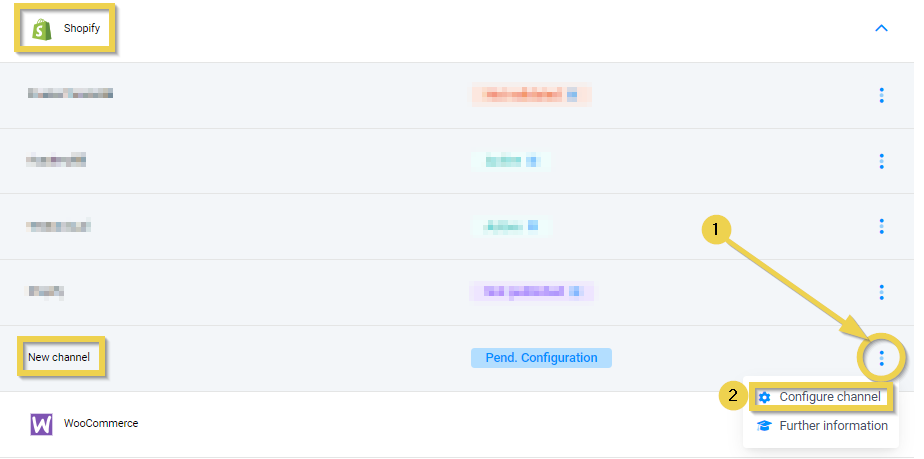
Clicking on the three dots (3) will open a small menu. Here click on the “Configure Channel” option then you will enter your connector settings.
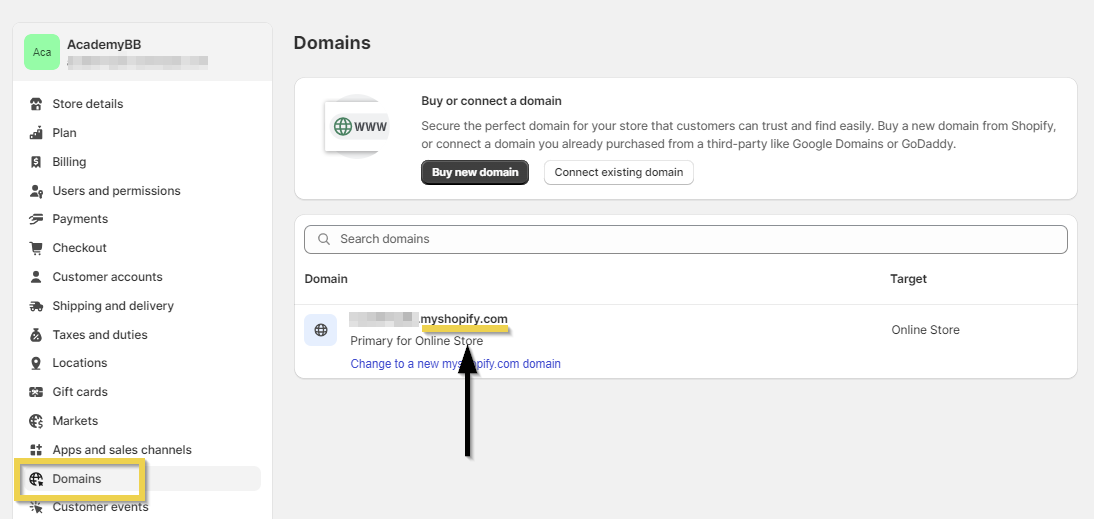
Before you get started, make sure you have your store’s Shopify URL handy. If you don’t know where to find it, you can check it directly within Shopify, in settings > domains:
You will then be able to configure your connector as shown in this image:
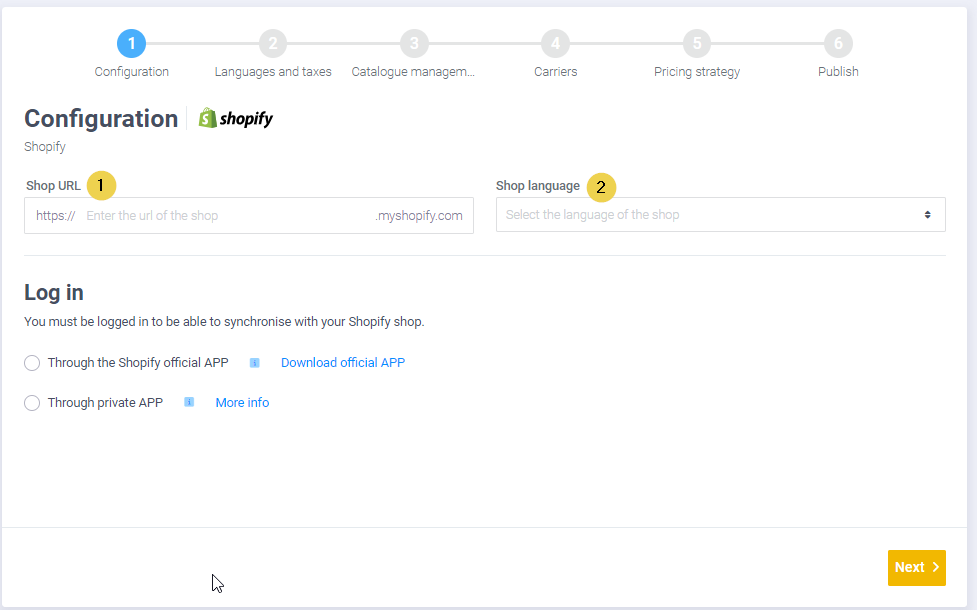
Fill in the space with the store’s URL. (1) You should put only what is included between the “www.” and “.myshopify.com”
Select the language in which you want to sync your catalog and categories. (2) It should be the same as in your Shopify store.
If you have a store with multiple languages, here you will need to select the language that appears as “primary” in your store.
Regardless of the domain you’re currently using, remember that the connection won’t work if it’s not the original one.
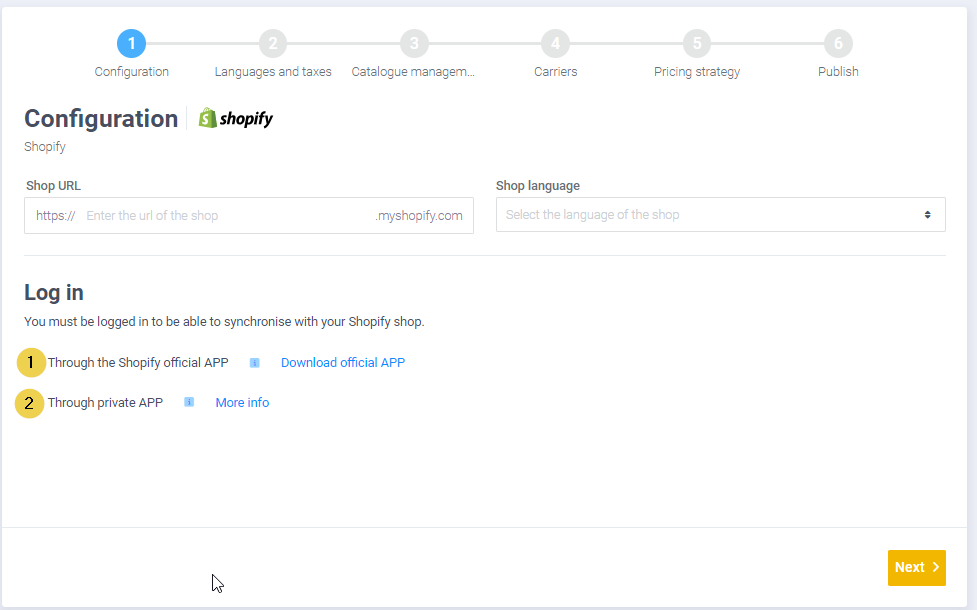
The last step will be to activate an App to connect the MIP to your store. There are two options for this: the official app (1) or the private app (2), as shown in the image.
Synchronise your store through the official Shopify App
The option we recommend is the official App, as it is for free and has been developed by us, which means that it will be updated in the event of any update.

You can download it from the link available on the MIP, or through the link and use it with any Shopify plan.
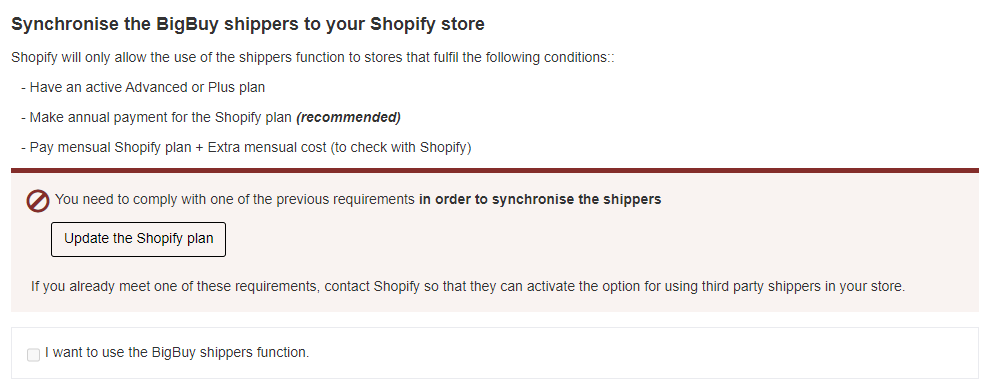
You can find more information about this on the following article: Requirements to automatically sync shipping costs on Shopify
Only if you want to use the functionality to automatically calculate shipping costs, you will need to meet certain requirements that Shopify demands.
If you don’t meet them, you will see an error-like message, but it only affects transportation. The rest of the features do not have extra requirements.
Once it’s properly installed, go back to your connector and click “login”. If you’ve followed all the steps correctly, you’ll now be able to click Next (the yellow button at the bottom right) and access the next screen: the language and tax settings.
Synchronise your store through the custom App
You can also connect your store to the MIP through a private App, although it involves extra configuration that may cause errors, while our application is optimized for this connection.
Nevertheless, if you want to create it, you should do the following:
- Activate the custom app development option
- Create and install a custom application
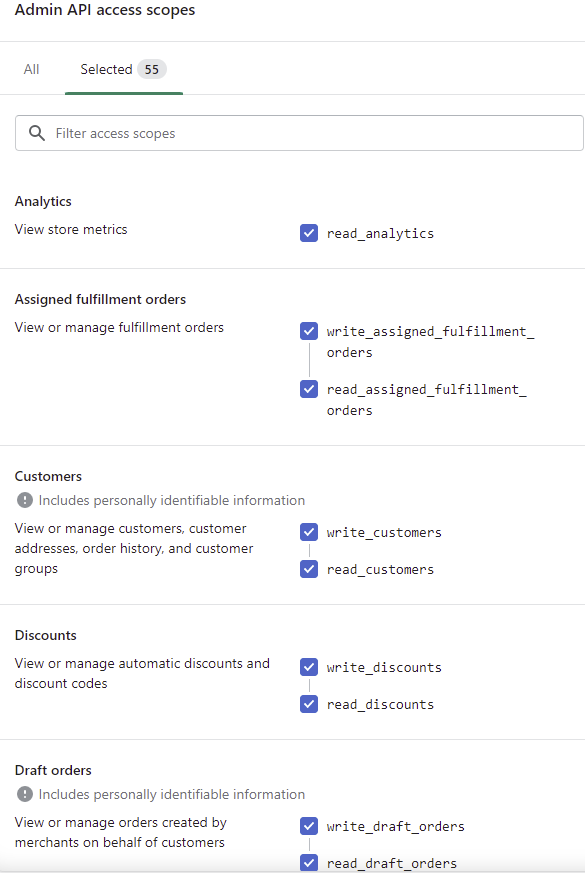
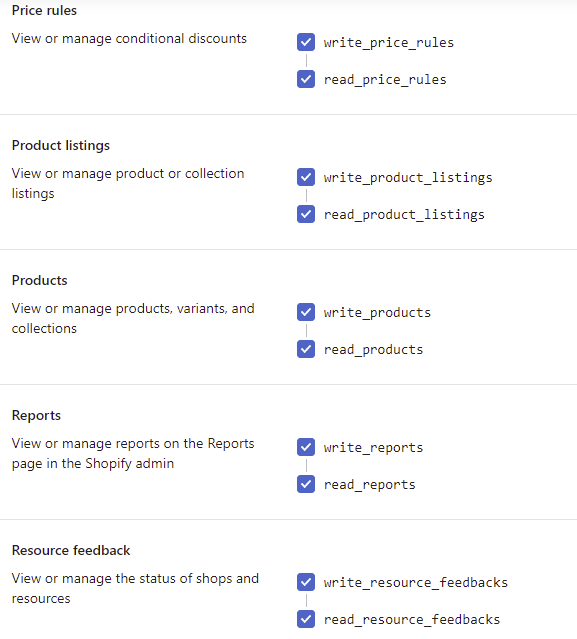
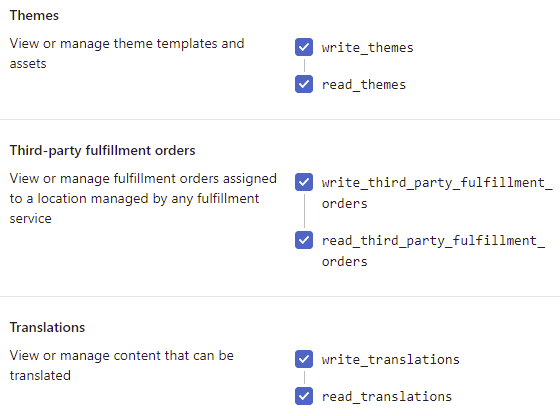
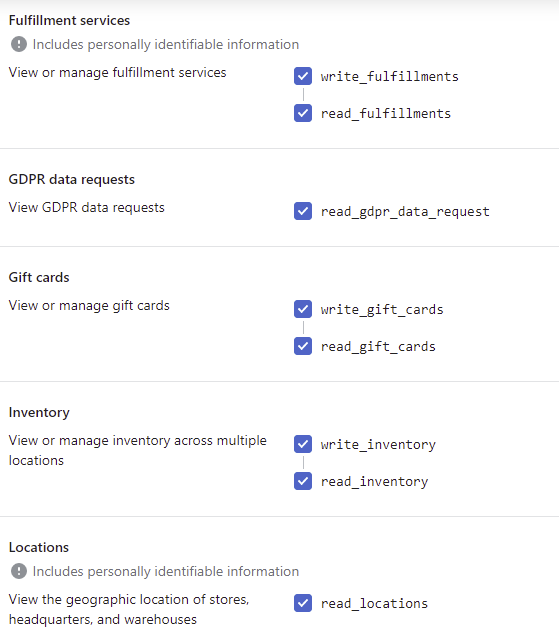
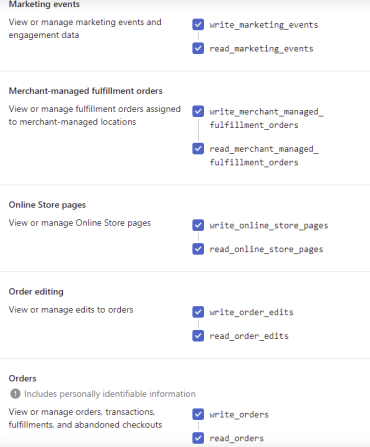
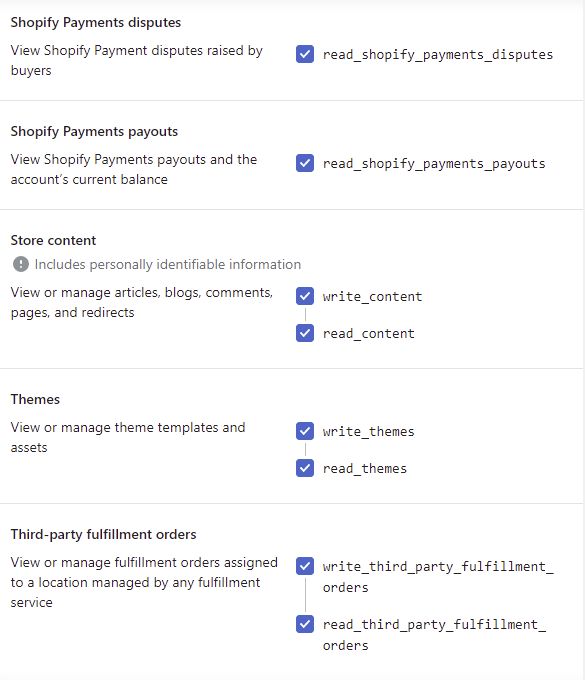
- Select API ‘scopes,’ activating the following requirements
- Install the application

You can find the detailed process in the Shopify article “Custom Apps.”