


 Contact

In this article, we’ll show you the steps to follow to sync WooCommerce with BigBuy’s Multi-Channel Integration Platform.
1. Server Requirements
First, it’s important to check that our server meets the Server requirements for synchronising Woocommerce with Multi-Channel Integration Platform
2. Previous steps
Before we install the plugin and start with the syncing process, let’s set up WooCommerce as follows:
2.1 Taxes
Taxes will need to be set up appropriately. To do so, click on WooCommerce>Settings>Tax. The following tab should then appear:
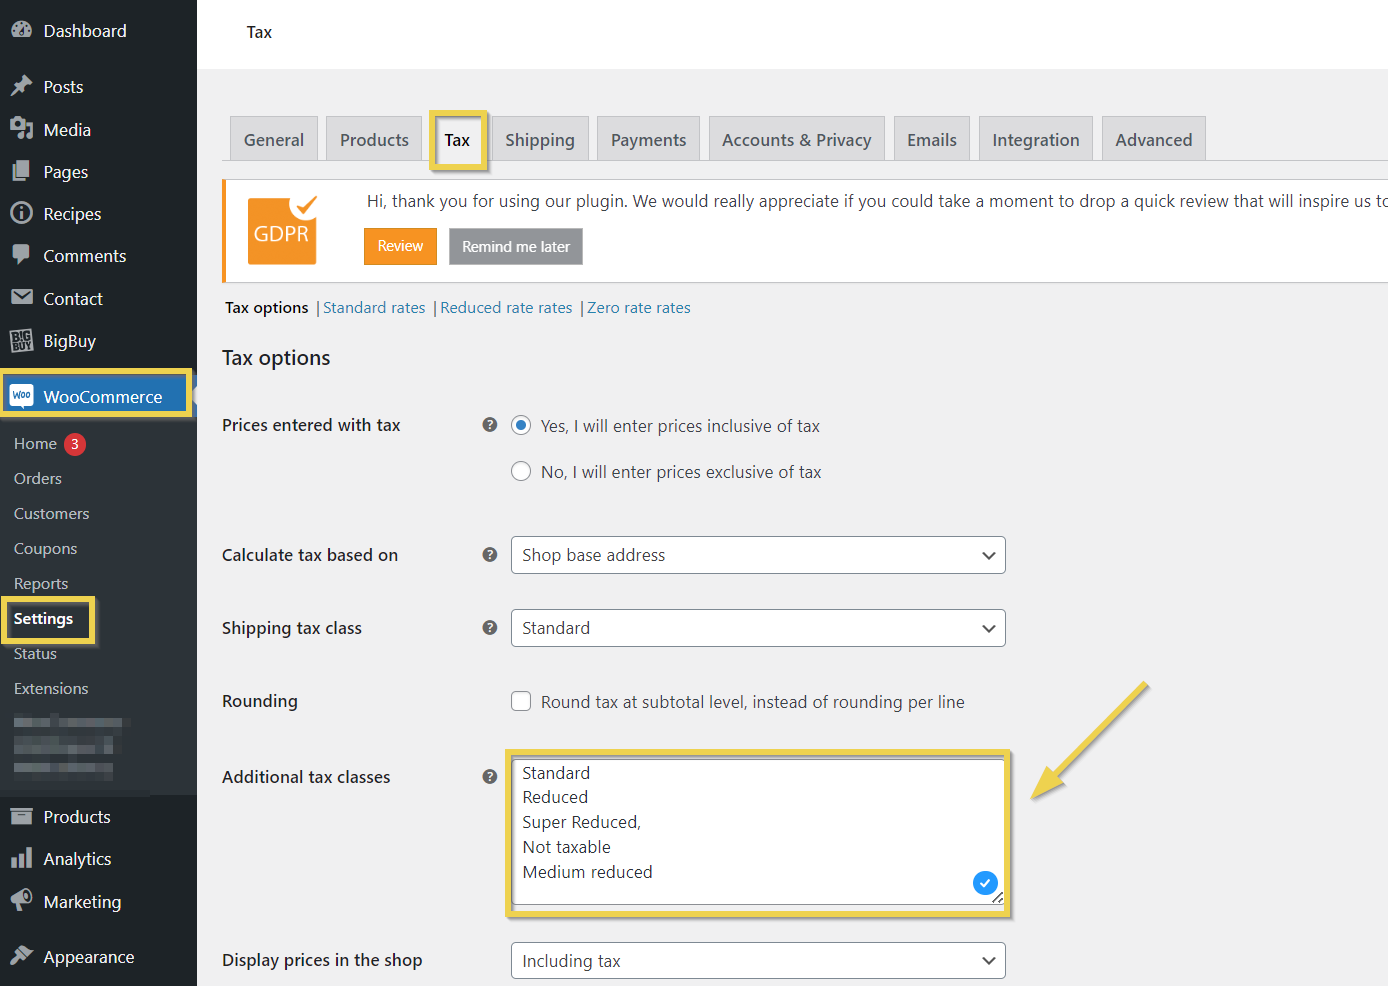
If the Tax tab does not appear, go to WooCommerce > Settings > General and select the Enable tax rates and calculations checkbox.

Once changes to tax classes have been saved, you can create different rates. Standard, Reduced, Super Reduced, Not taxable, Medium reduced
You can create one, two or three different rates. When creating these rates, you only need to fill in the Country code, Rate and Tax name fields

To create these rates, click on all of the rates in the Tax menu.

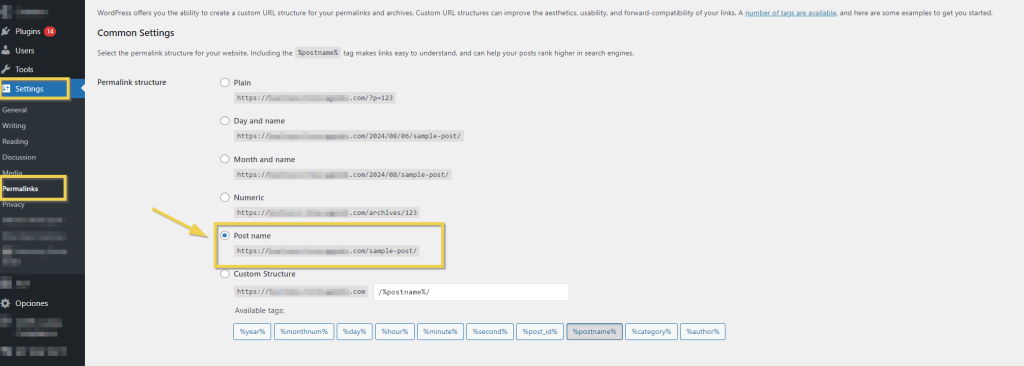
2.2 Permalinks
- Settings → Permalinks → Common Settings and select the Post Name option
3. Installing the BigBuy Dropshipping Connector plug-in for WooCommerce
3.1 Searching the plugin
Now, we can start with the installation of the BigBuy Dropshipping Connector for WooCommerce plugin. To do this, go to the backoffice of your website and go to Plugins> Installed Plugins and click on Add New.
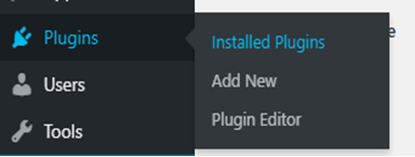
Search BigBuy in the search engine, click on Install now and activate the plugin “BigBuy Dropshipping connector for WooCommerce”

Once installed, the module BigBuy Dropshipping Connector for WooCommerce should appear in the section: Plugins > Installed Plugins.

3.2 Manual Installation
You can also install it manually through the following link by clicking on the Download button .
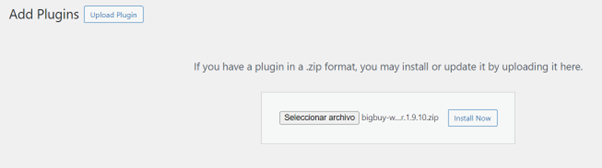
Once you have downloaded the zip file, you will need to follow the steps below.
Go to the back office of their website: Plugins > Add New and click on Upload Plugin.
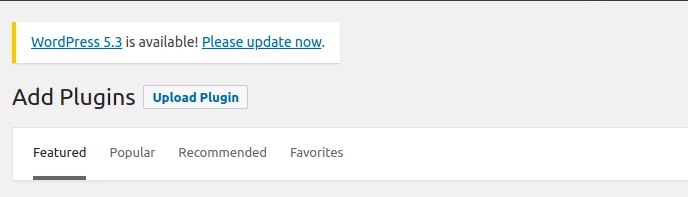
Select the file you just downloaded and click Install Now.
4. Synchronization with Multi-Channel Integration Platform
Once installed, the BigBuy Dropshipping Connector for WooCommerce module, log in to the Multi-Channel Integration Platform to be able to start using it.
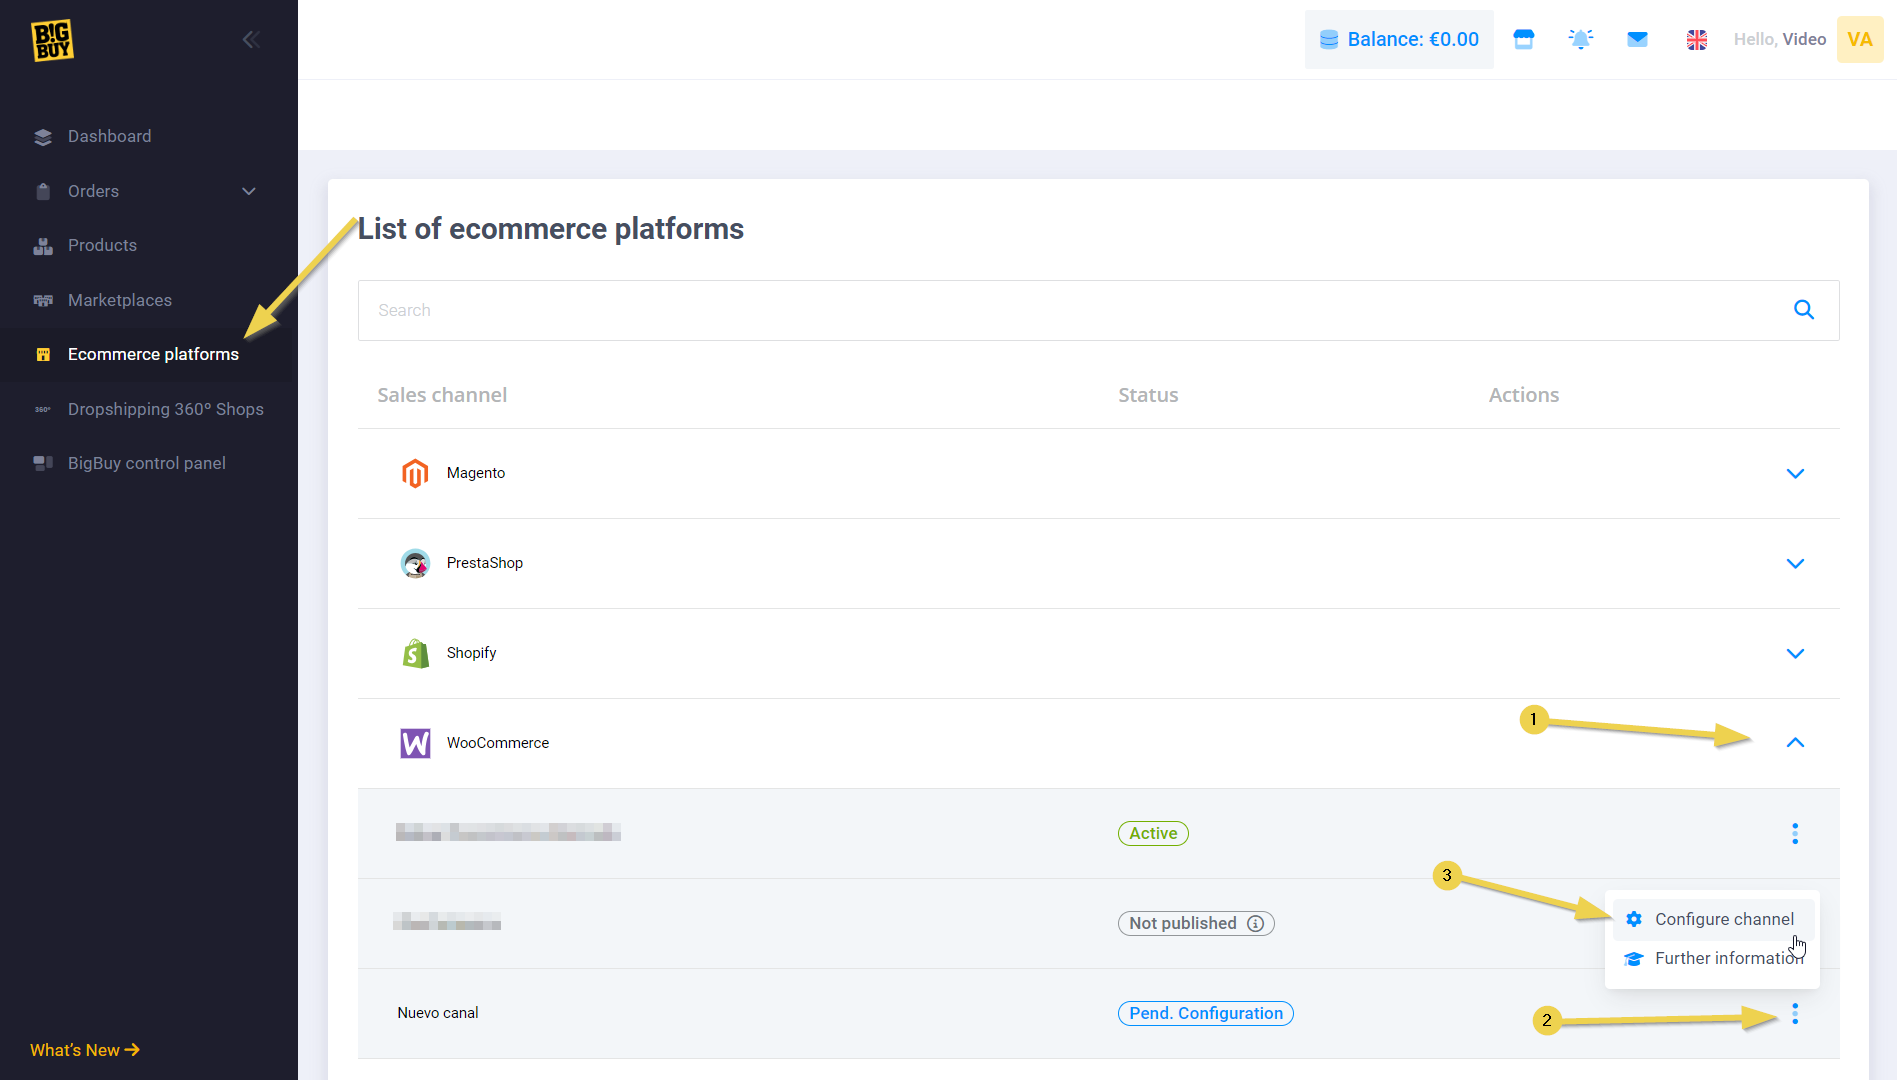
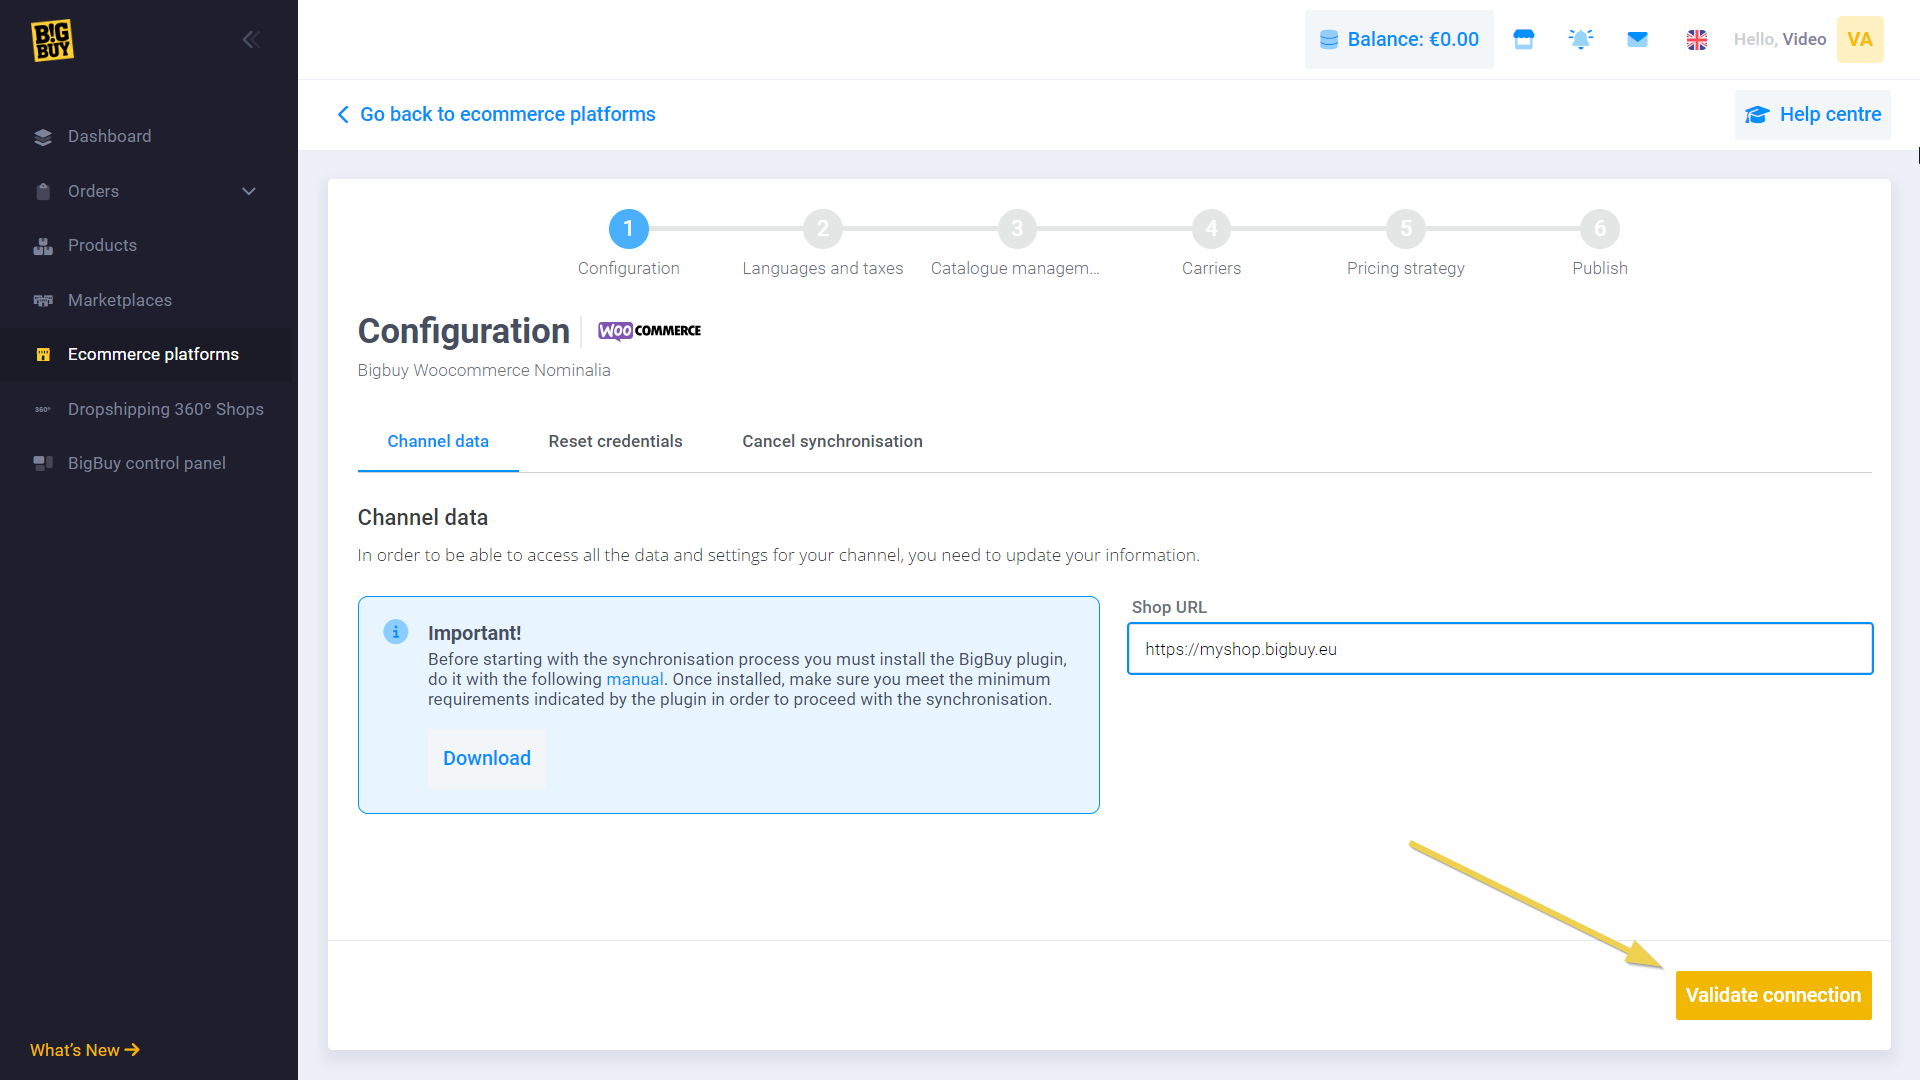
Vaya a Multi-Channel Integration Platform > Ecommerce platforms > WooCommerce
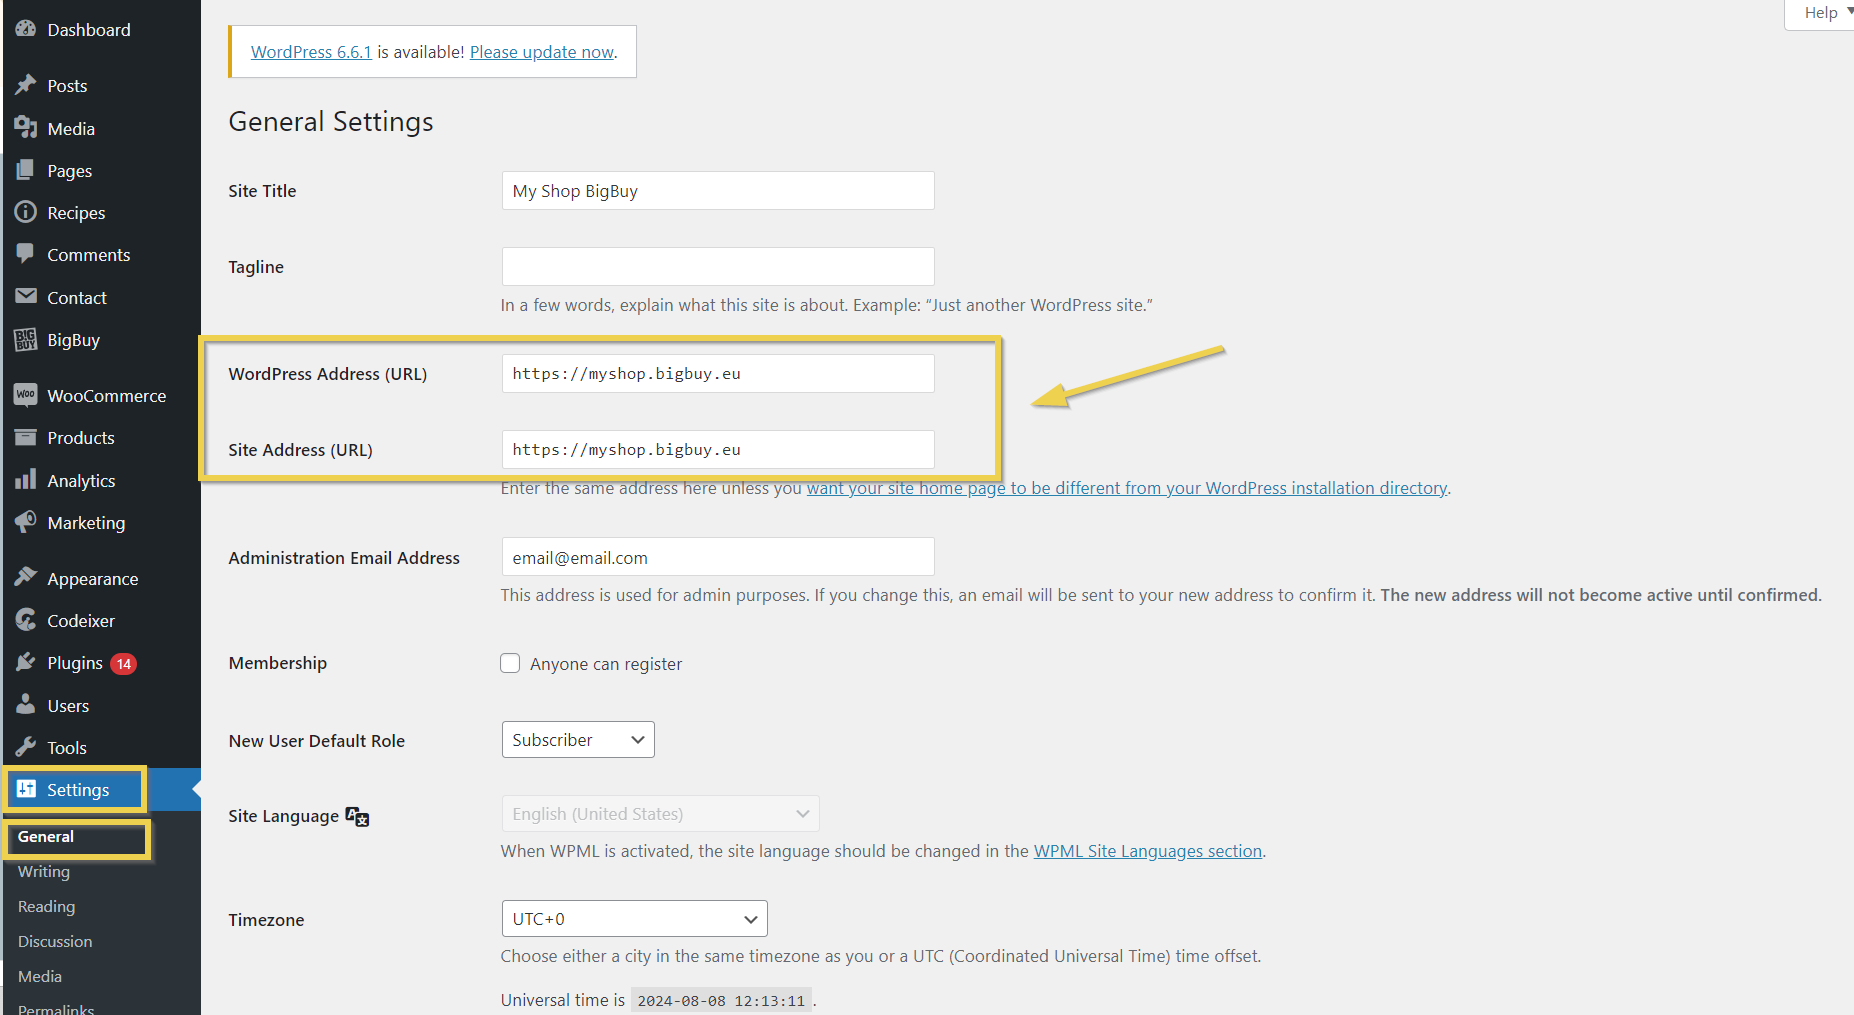
Add your store URL and click login. Enter your WordPress login credentials and click Next.

Make sure to enter the domain as it appears in your store, if you don’t have www in your store, you should not enter this value in the Multi-Channel.
Click continue and after logging in to WooCommerce (only if the session is not already open) you will be able to grant the necessary permissions to the plugin:

Once approved, you will be directed back to the Multi-Channel Integration Platform.
5. Cron Jobs
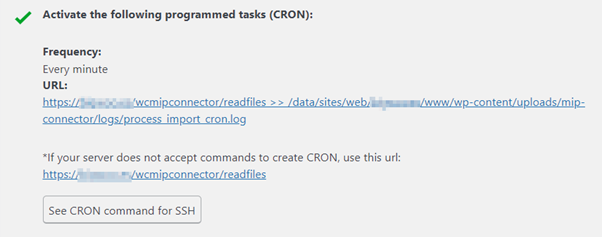
efore you click continue, go back to the plugin and access the Minimum Requirements tab. If you have made sure that you complete all the previous steps (link) you should now see all the requirements in green, except for the one that refers to the CRON task:
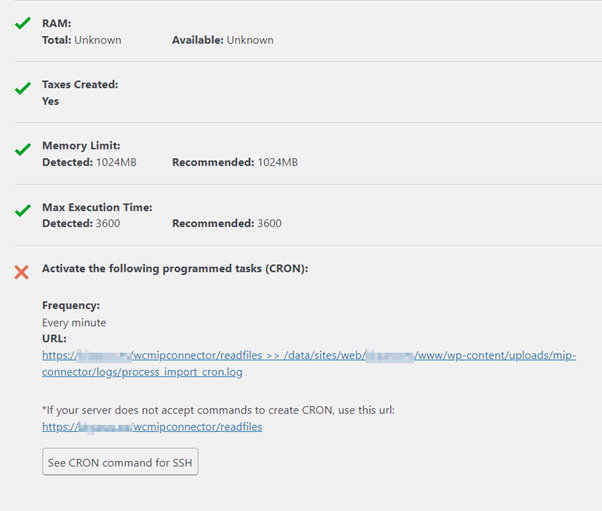
Now you will have to configure one of the CRON tasks proposed by the plugin.
We recommend using the first one, using the curl command.
Since these tasks need to be configured at the server level, it’s best to contact your hosting provider if you’re not sure how to set them up or which one to choose from.
If the CRON task has been configured correctly, the requirement will appear in green, like the others:
6. Connecting WooCommerce to BigBuy
Once these configurations are completed, you can synchronize your store from the Multi-Channel Integration Platform.
Go to Multi-Channel Integration Platform > Softwares Ecommerce > WooCommerce and click continue (or Validate Connection)
7. LANGUAGES AND TAXES
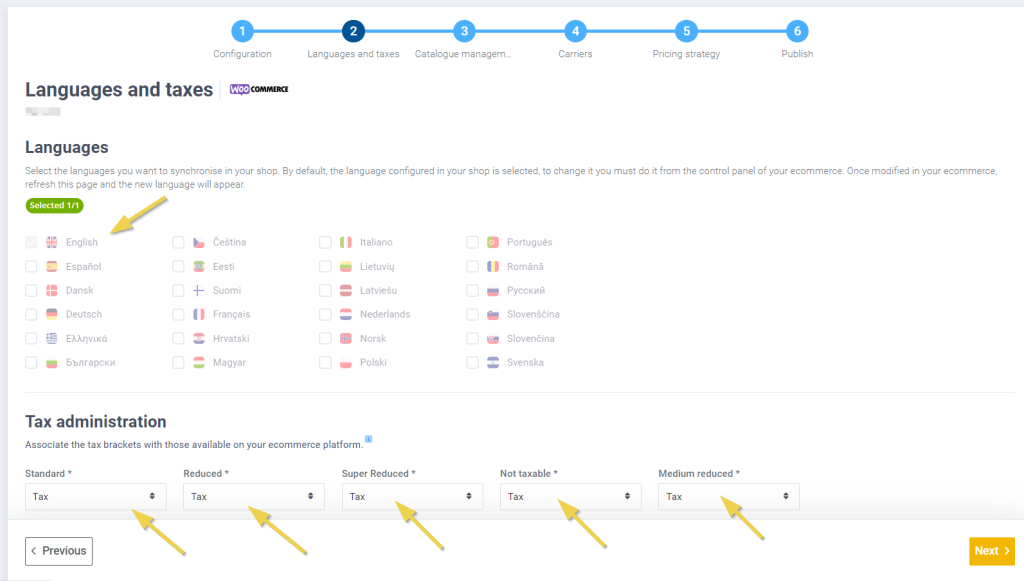
Once you have entered your log-in details, you can click on Continue and move on to the next stage: languages and taxes.
In Multi-Channel Integration Platform you’ll need to relate each of the Standard, Reduced, and Super reduced rates to the rates created in the first step in your WooCommerce.
As for the language, by default the language of your store is selected, if you want to change the language, then you must change it in your store settings and return to Multi-Channel Integration Platform to update it.
Now, you’re ready to work on your product selection: How to manage product selection through the Multi-Channel Integration Platform