


 Contact

-
Invoice settings
To access the invoice settings of your PrestaShop store, click on “Orders> Invoices”, which is located on the side menu of your control panel.
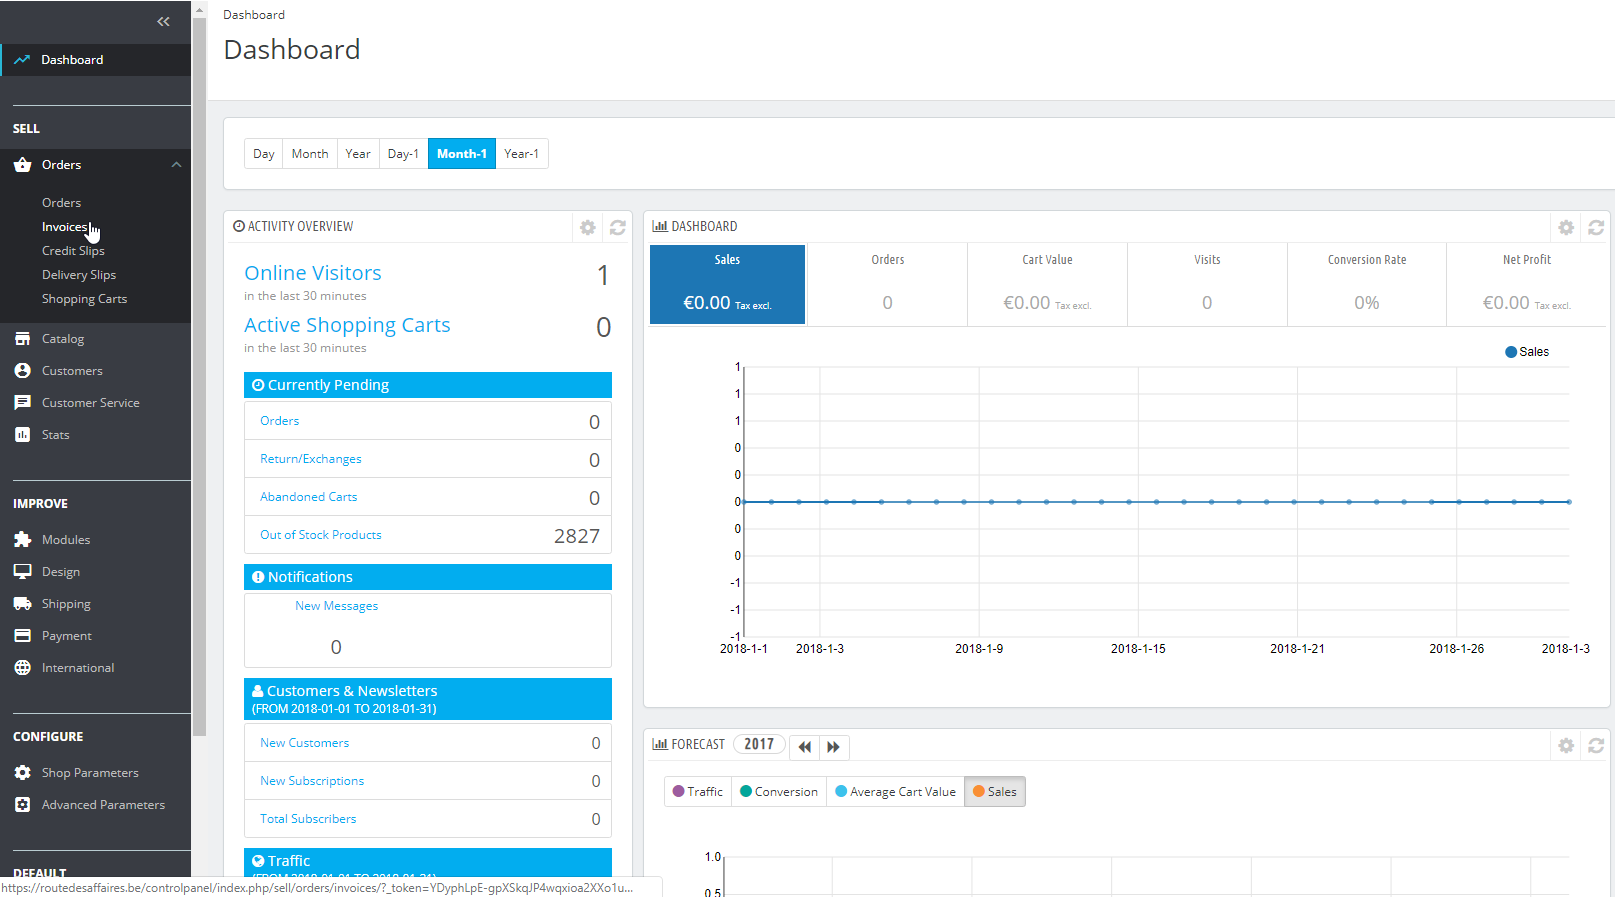
On the PrestaShop invoice settings page, you will find 3 different sections.

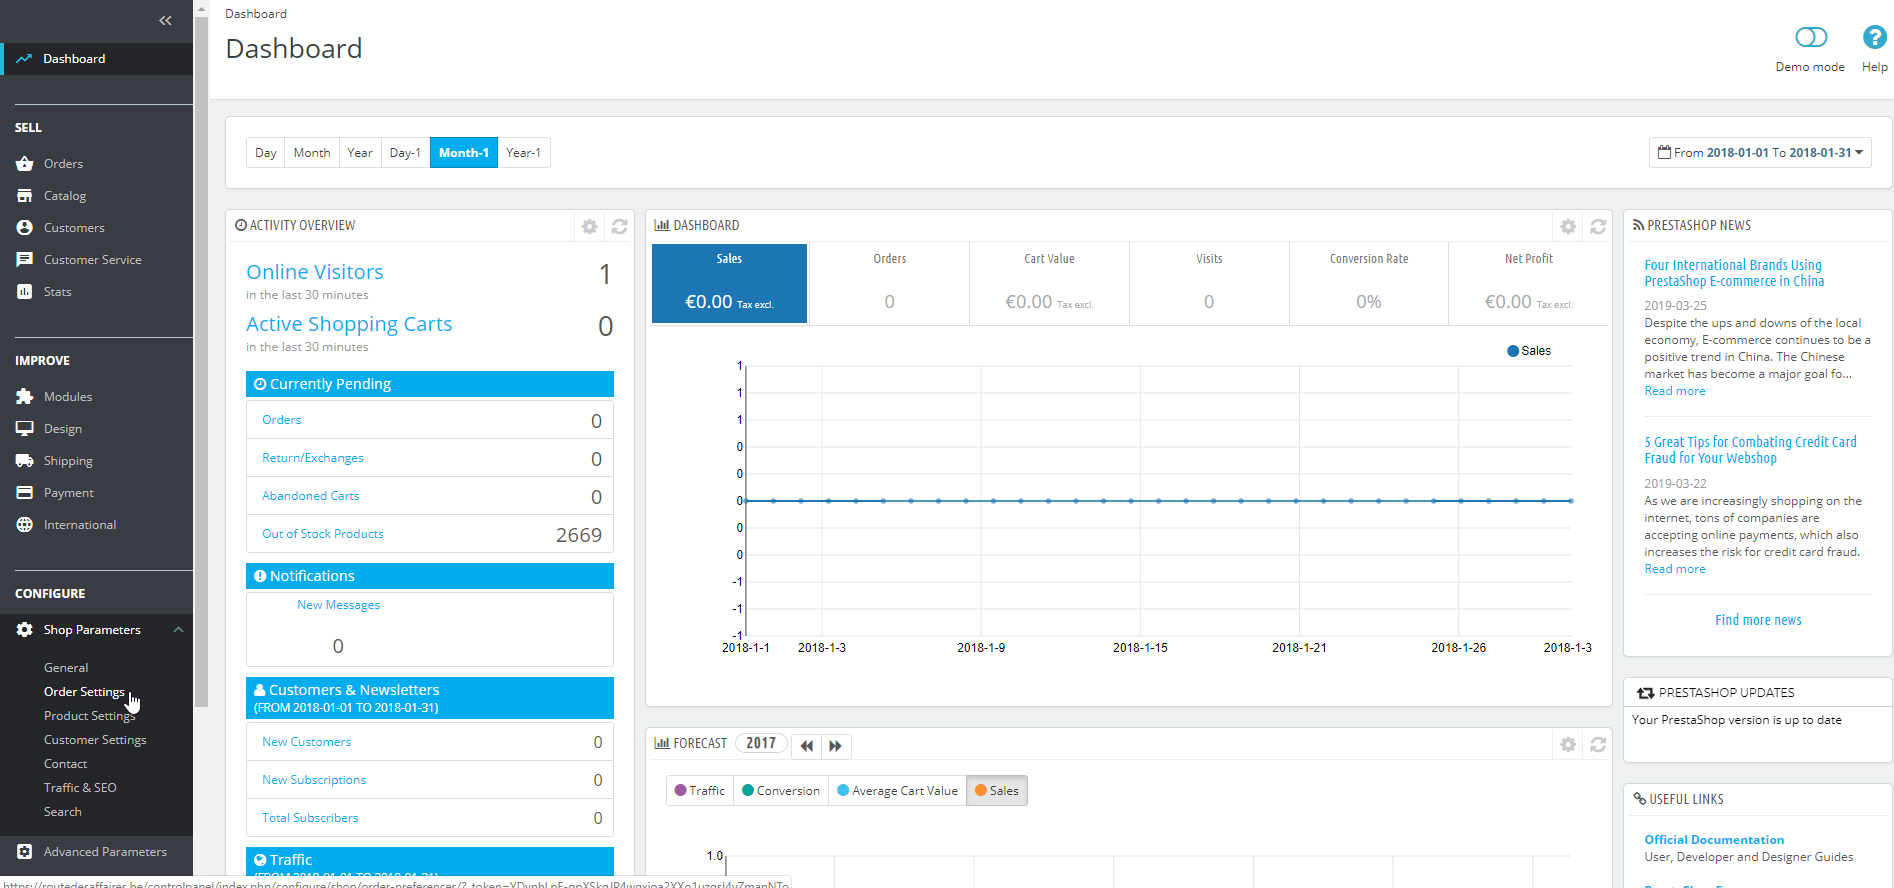
- “By date”: allows you to generate a .pdf file with all the order invoices that have been generated between the two dates you select in the search. Please note that not all orders generate invoices, this depends on the current status of the order, since not all statuses “generate” invoices. You can check which order statuses generate invoices by accessing “Shop Parameters > Order Settings” on the side menu.
On the “Statuses” tab, you will find a list of all the possible order statuses and a column indicating whether the order status generates an invoice or not.
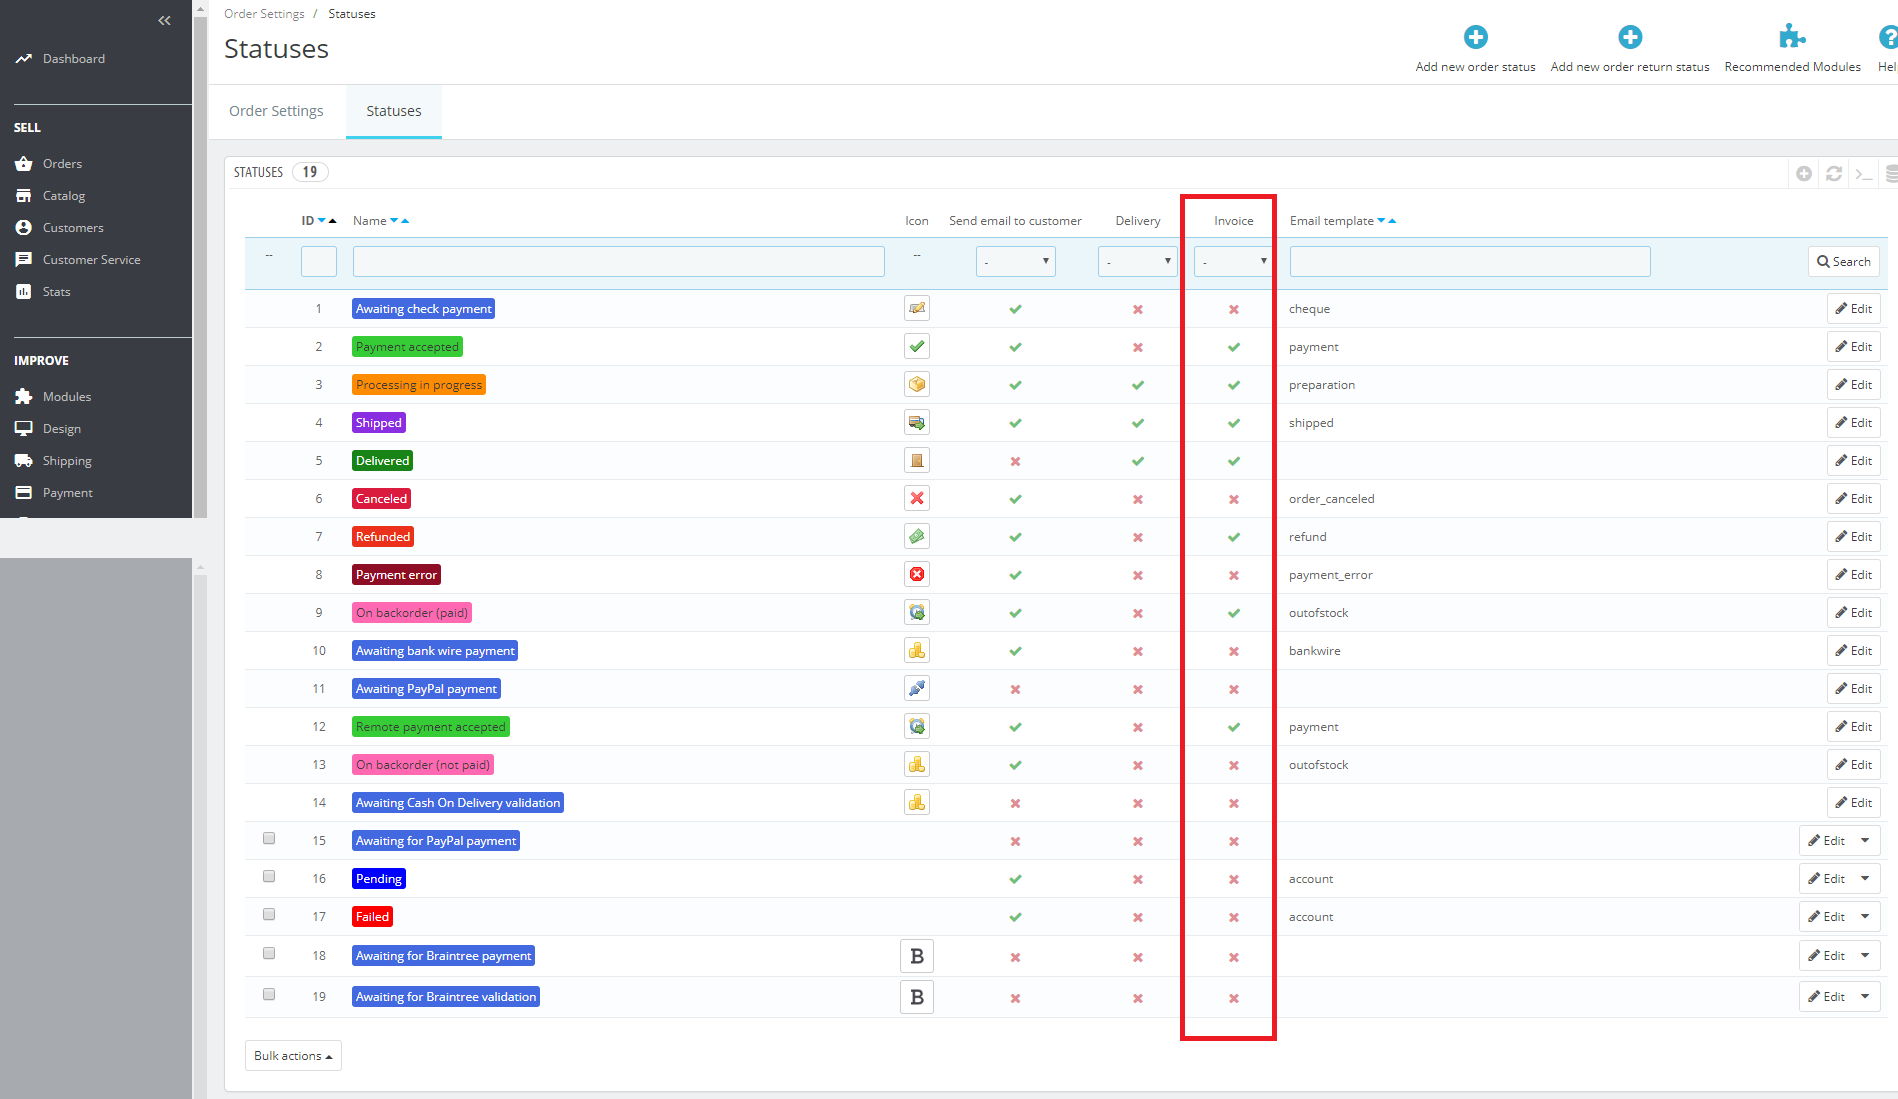
- “By order status”: this section allows you to download all the invoices for the store’s orders that have a specific status. Remember that not all order statuses generate invoices, as previously stated.
- “Invoice options”: in this section you can configure the invoice options that are generated in your store
You can modify the following options in this last section as follows:
- “Enable invoices”. This option will send the invoice for the order placed to the customer, provided it is active.
- “Enable tax breakdown”. This option will show a tax breakdown on the invoice generated from a sales order, in case any taxes are active in the store.
- “Enable product image”. This option enables the main image of the product that has been purchased to appear on your customer’s order invoice.
- “Invoice prefix”. This setting allows you to modify the prefix of the invoices generated in your store in all the languages that you have enabled, e.g. # FA00001.
- “Add current year to invoice number”. This option adds the current year to the invoice code.
- “Reset sequential invoice number at the beginning of the year”. This option allows the billing number sequence to be reset to 0 at the beginning of a new year.
- “Position of the year date”. Allows you to indicate the position of the year in the invoice’s billing code.
- “Invoice number”. This setting allows you to indicate from which number the next generated invoice code will start, this will then increase consecutively with each additional invoice.
- “Free legal text”. The text entered here will appear on the invoice, just below the payment methods. You should include the text in all store languages.
- “Footer Text”. The text entered here will appear in the footer of the invoice. Usually, this section is used to enter tax information, such as full name, ID, official address, company name, VAT number or tax residence.
- “Invoice model”. Here you need to choose the invoice design. Select the invoice style “Invoice”. There is a possibility that when you install a new template or a certain unit, different design options will appear for that template.
- “Use the disk as cache for PDF invoices”. This option saves memory but slows down the creation of PDF invoices. By default, the option is set to disabled.
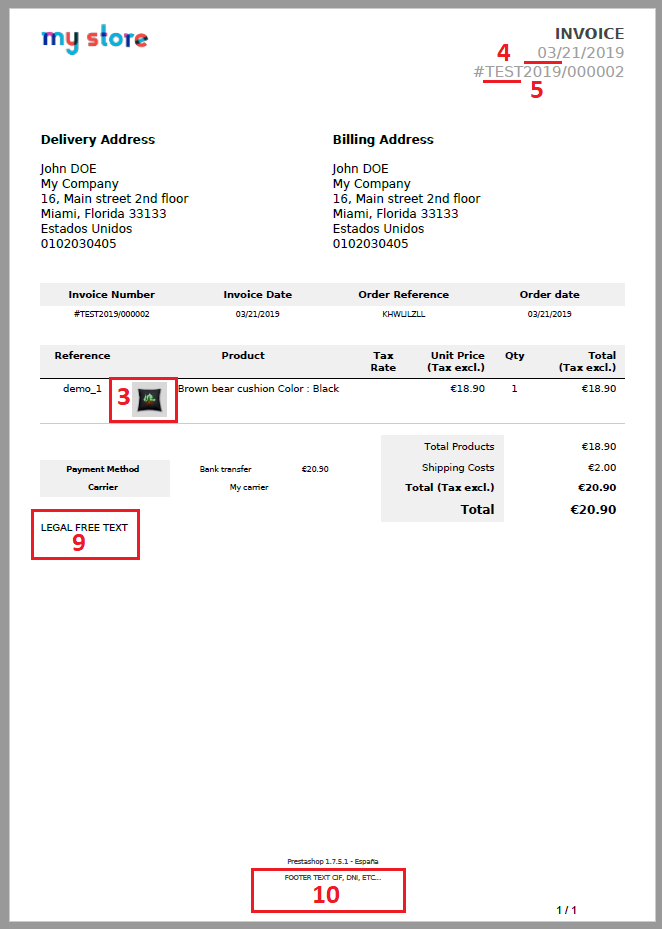
When you modify the invoice settings in your store and download the invoices again, check that the invoices have also been modified according to the settings you have defined in this section.
Here is an example of the invoice fields that you can change using the settings described above.
-
Display order invoices
To view the invoice that has been generated for a particular order, or to resend the invoice to a customer, go to “Orders > Orders” on the side menu of the PrestaShop control panel.

On this new screen you will find a list of all the orders that have been placed in your store. To check the invoice that has been generated for the order, access the order you want by clicking “View” or by clicking on the same line of the order.

Within the order information you will find the “View invoice” option in the upper information tab, which will allow you to download the invoice of the corresponding order in .pdf format.

The invoice will be generated with the settings defined in point 1. If the settings are subsequently modified, the invoice will be automatically updated.
In the same section, the order status is displayed, and you will see the option to “Resend email” in the order line.
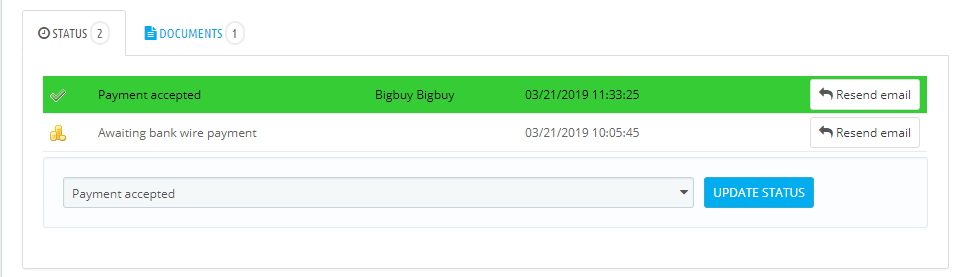
If you click this option, PrestaShop will email the updated invoice with the new settings back to your customer. If you want to change your store’s invoice settings and want to resend the invoices to your customer, you need to follow these steps.