


 Contact

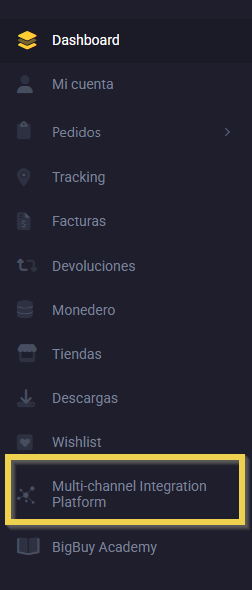
In order synchronise your Prestashop shop with BigBuy, you can do it by using the Multi-channel Integration Platform (MIP), our centralized management platform for your ecommerce and other digital channels. Find out how.
Attention !: Remember the minimum requirements required for your hosting if you want to use Multi-channel Integration Platform.
First of all, you need your shop, built with Prestashop, with a domain of your own. Once you have it, you can start the synchronisation as it follows:
- Before you start, you need to have an BigBuy Ecommerce or a higher pack. Otherwise, you won’t be able to access the platform. If you don’t have it yet, you can get it our Wholesale Packs page.
- Once you have your Enteprise Pack, go to BigBuy’s Control Panel. Click on the Multichannel button.
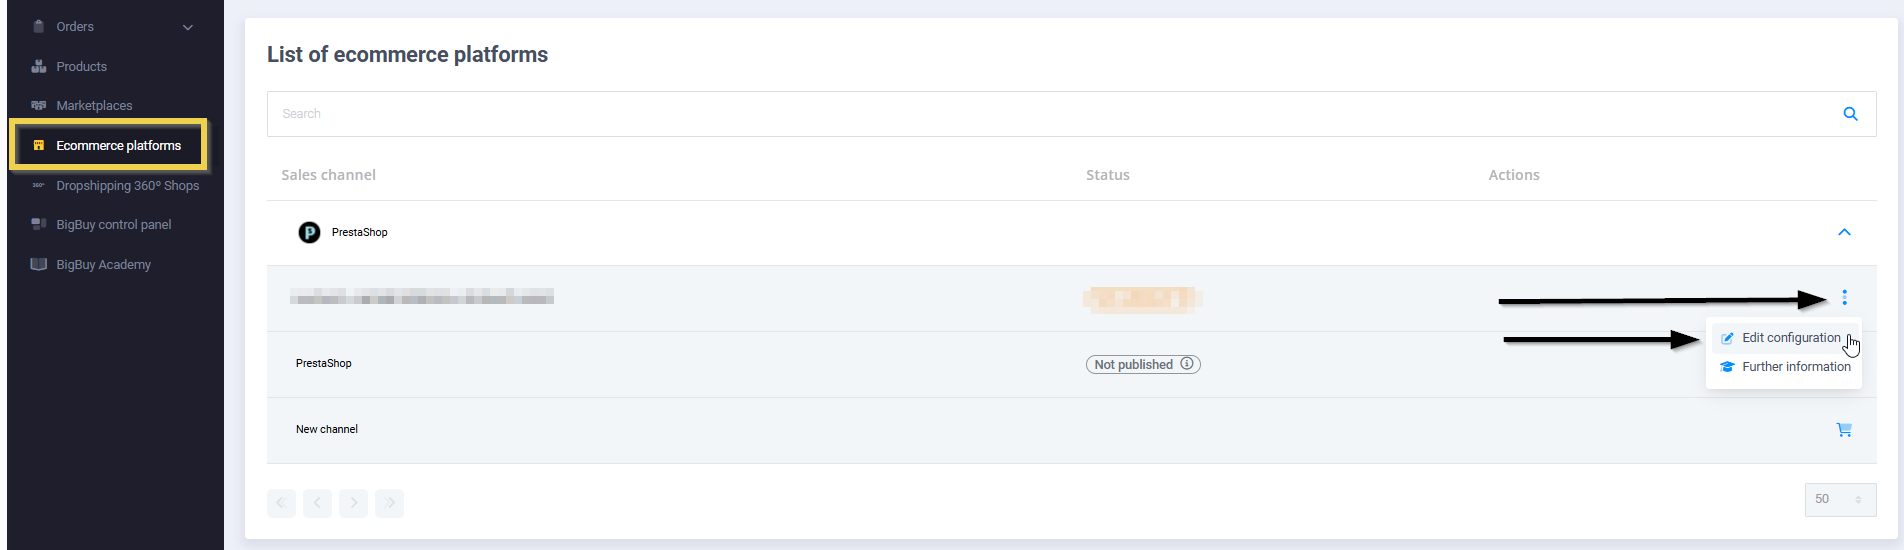
- Once in MIP, go to the left menu, option Ecommerce Platforms. You will see the ‘PrestaShop’ section. Scroll down by clicking on the arrow. Click on the button with the 3 dots on the right and then on ‘Edit configuration’ to connect a new shop.
- 2. You’ll see a new screen with different elements:

– Domain: In this section, you must write your shop’s URL (remember to include http:// or https://). - To download the PrestaShop module, click on the first “Download” button in the blue box on the right. When it has downloaded, install it in your PrestaShop store.
- To connect your store to PrestaShop, click on Login. Then log into your store. Enter your details and click on Login.
 Then accept the Multi-Channel Integration System permissions. To do this, click on Agree and the synchronisation will be carried out.
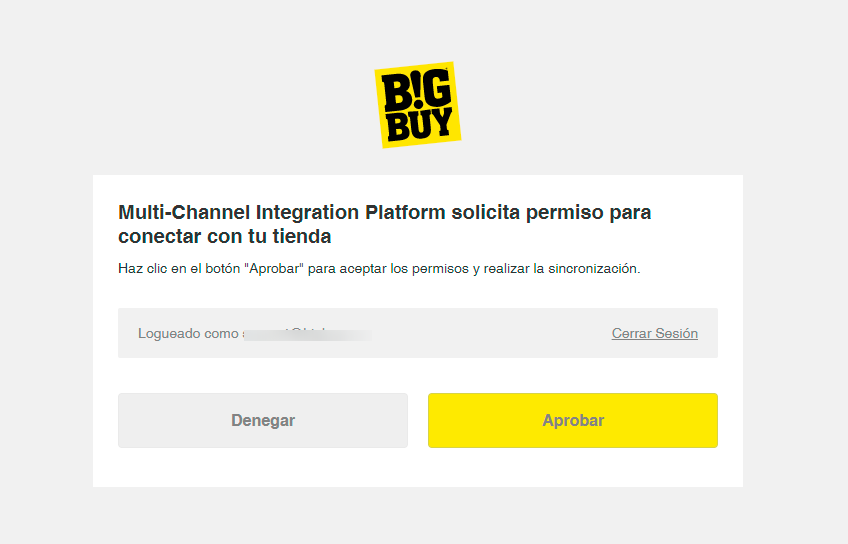 Learn how to install the mmoconnector module in this post.
To continue the publishing process, your shop must comply with requirements to connect to the Multi-channel Integration Platform.
You can find further information on this through the following link.
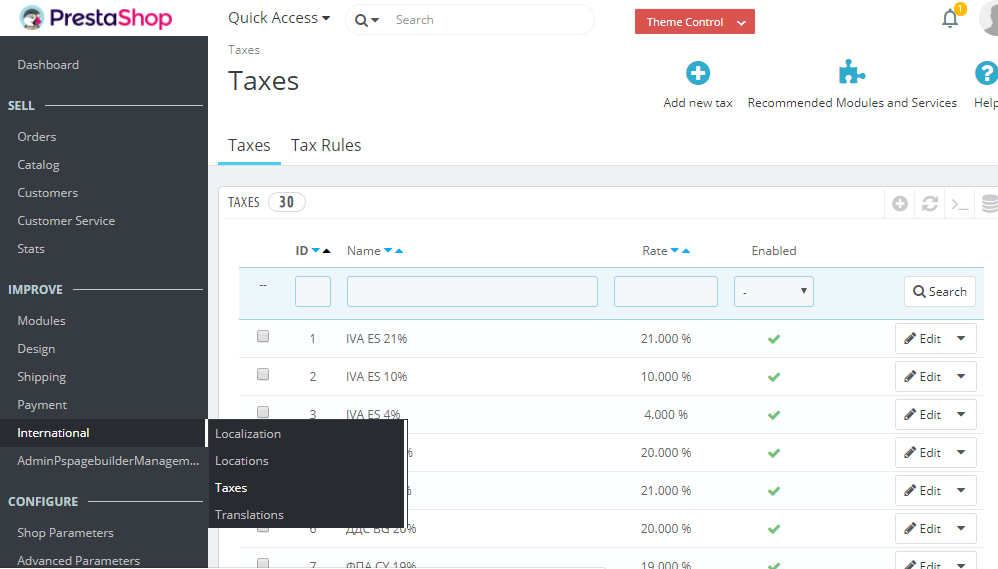
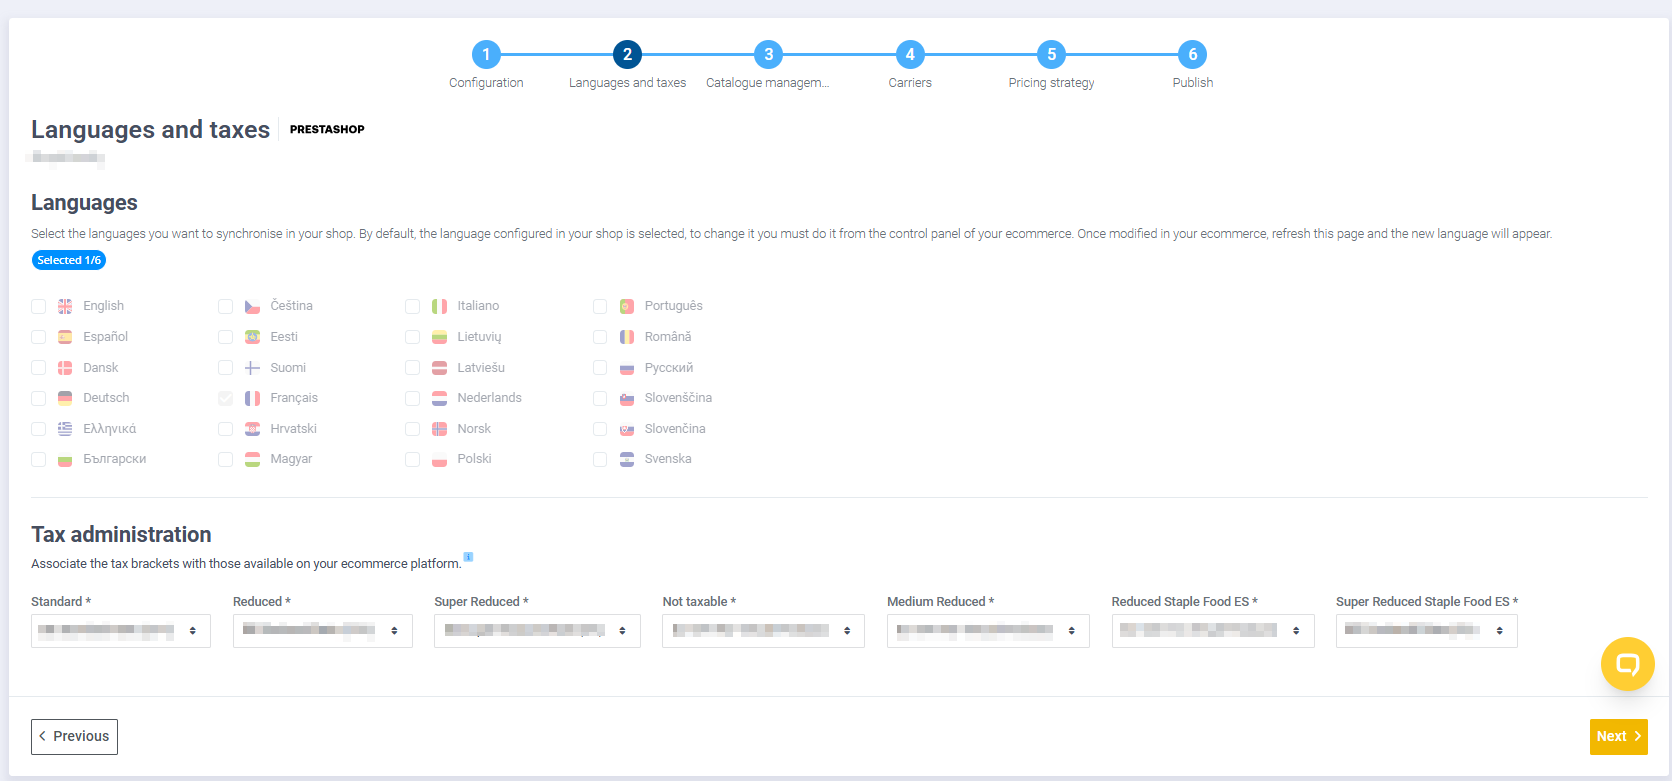
- Once you have done this, you will be able to continue. The tool will validate that the connection with the shop is correct and the option for selecting languages and taxes will appear. In this same step, you need to link the taxes you are going to use in the PrestaShop. If you have not configured the taxes in your PrestaShop store, from the control panel, go to the “International > Taxes” section. You need to add a new tax entry via the “Add new tax” button located at the top of the screen.
Complete the following fields: “Name” (do this for all the languages in your shop by using the language selector), “Rate” and “Enable”.


The following form will appear, in which you need to complete the “Name” field and click on “Save and Stay”.

After saving these changes, the new form will appear where you need to add and configure the new tax rule for the required countries. Remember that you need to click on the “Save” button to save the configuration for each country.

Following this, you need to link these tax values in the Multi-channel Integration Platform.
Important!: If you see disabled languages in this step, it means that those languages are not activated in your Prestashop. To activate them in MIP, go to Prestashop, activate the languages, and then go back to MIP and refresh the page.
For each language, you need to select if you want to keep the names and descriptions of the products, as well as the category names provided by BigBuy. If you want to create your own texts, deselect the corresponding boxes according to language.
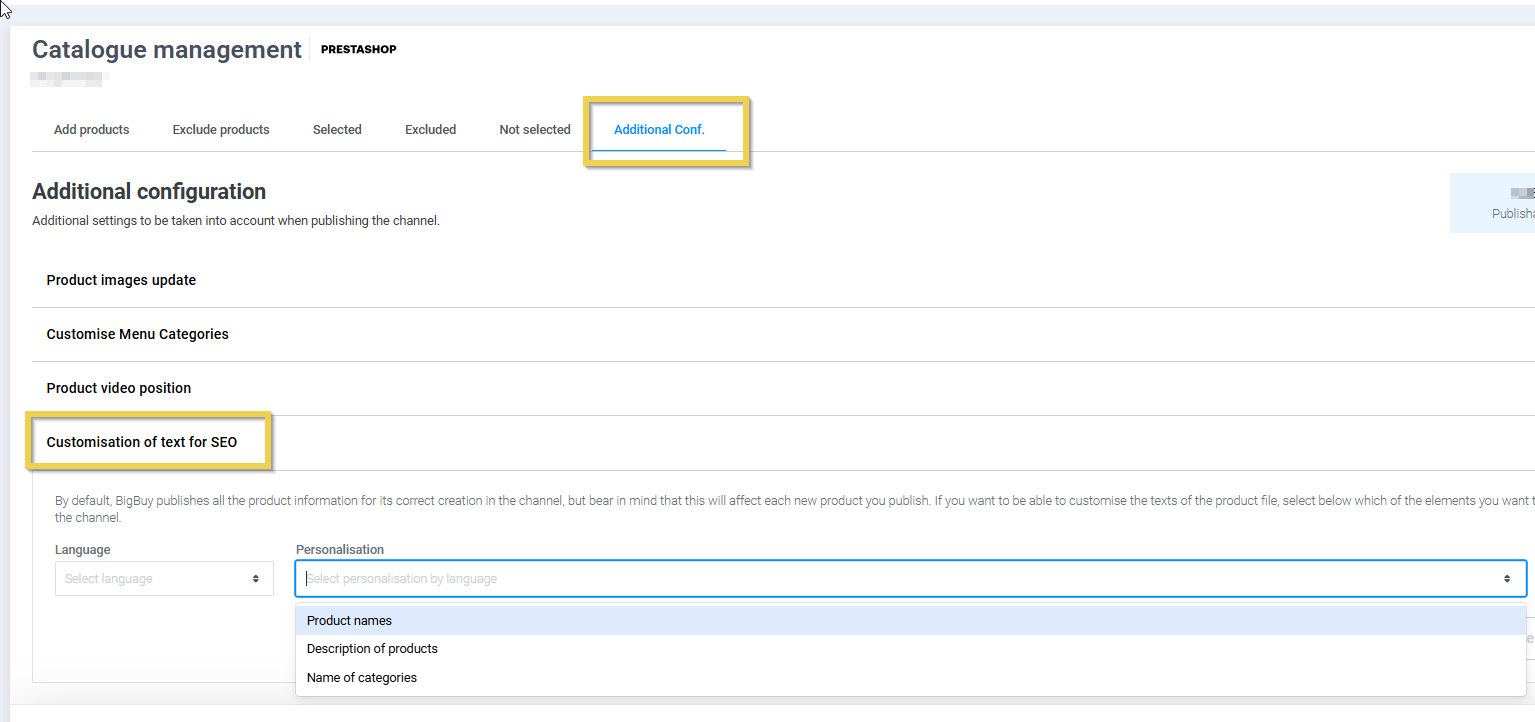
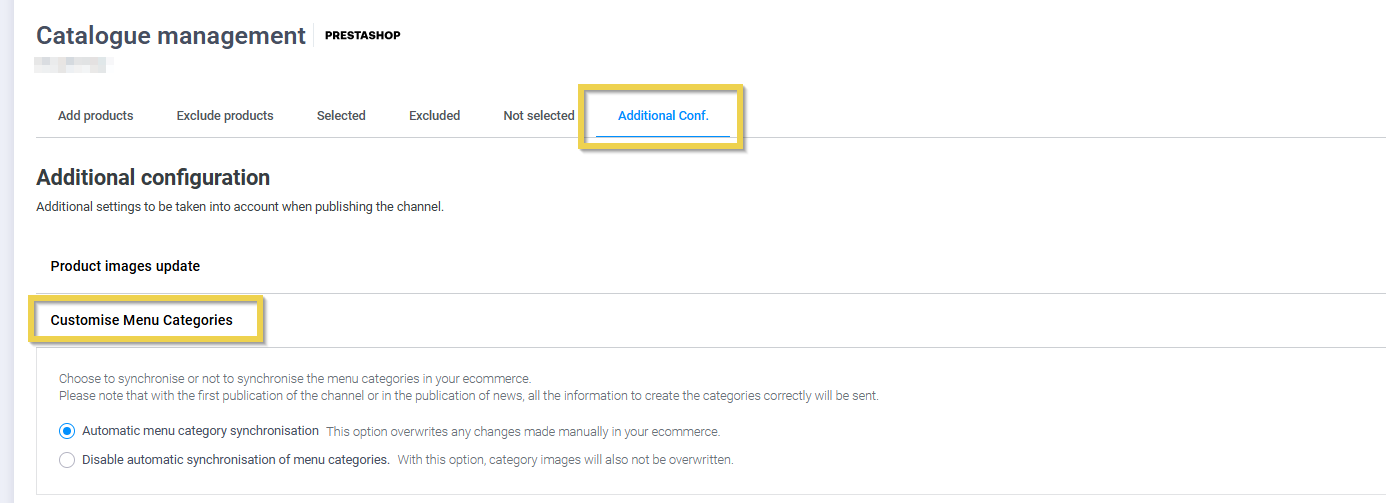
If you want to change the category tree, you need to select the second option so that your changes are not updated by the Multi-Channel Integration Platform. Remember that if BigBuy restructures the category tree and you have this option active, it will not be updated. This option will respect the category changes that you make in your ecommerce, as well as the deactivated categories, and the category images will not be overwritten.
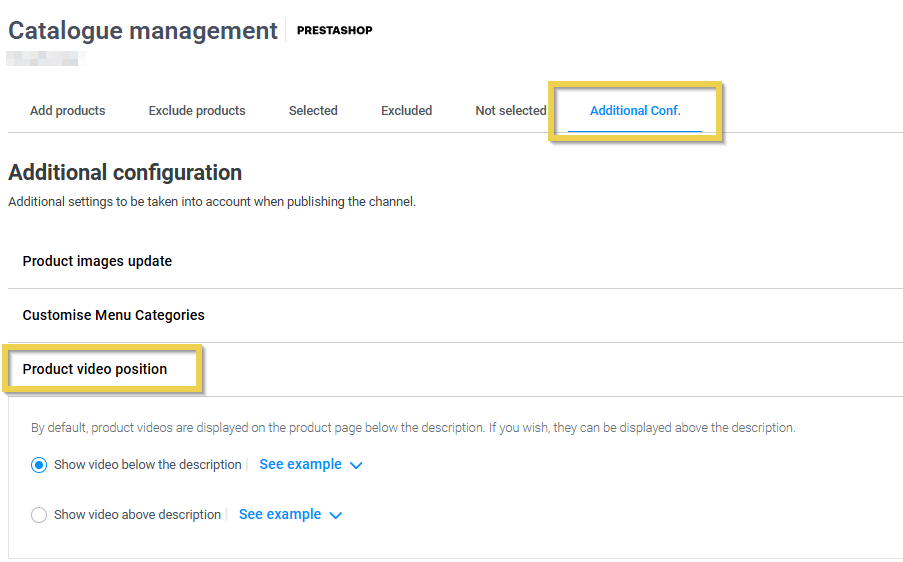
Product videos
This section allows you to select the part of the product description in which to upload the videos, if there are any. You have the option to show the video on the lower or upper part of the product description within the store.
9. Following this, configure the pricing strategy. BigBuy creates all the retail prices automatically (to correspond to BigBuy’s Recommended Retail Price). If you do not want BigBuy’s RRP to appear, you can set your own pricing rules. In the event that you leave it “Off”, the RRP will be applied. If you activate it, you can create new rules by clicking on the “+” button.
In the following article, we explain how the price rules operate.
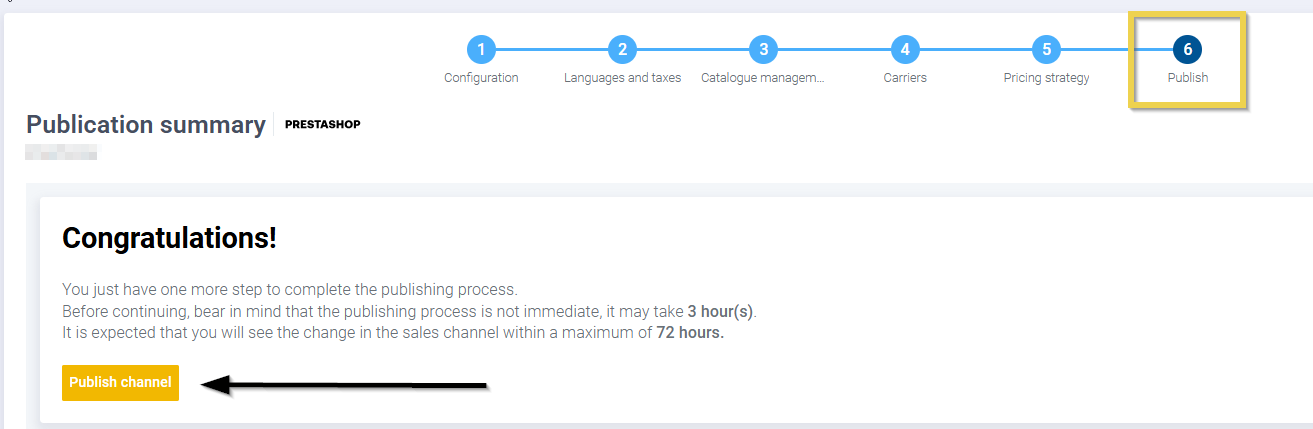
10. Lastly, click Publish and the Prestashop store will synchronise all the options that you have configured.
11. Now that your ecommerce is up and running, you might be interested in selling more. Check out the MIP options for Shopping Engines and Emarketplaces!
Note: Remember that every order of your Prestashop store and the rest of digital channels is shown in the "Orders" section of MIP.