


 Contact

In this guide, you will find all the information you need to configure the shipping costs for the products in your store. To begin, we will explain how to access the shipping costs table in the Multichannel and use it as a reference when configuring your Shopify store.
1. Access to the table of shipping costs and shippers
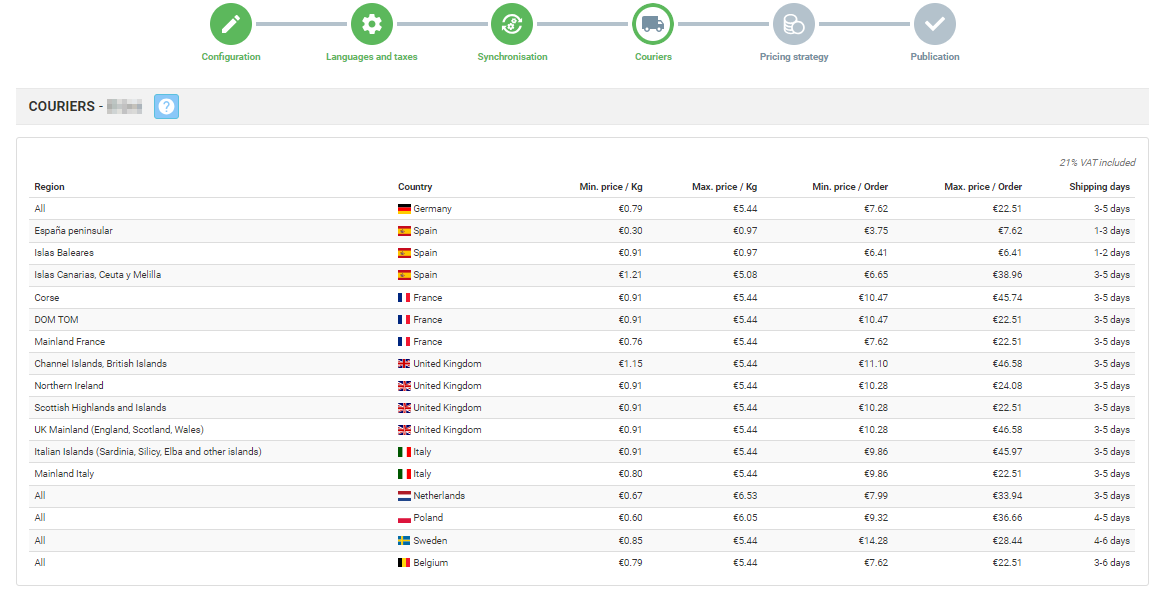
In the “Shippers” step on the Multichannel, you will find a table showing information on shipping costs to some countries. This table is a useful tool for setting shipping costs, but it is important to keep in mind that it only shows the costs for some countries.
2. Looking up the shipping costs for all countries
If you want to know the shipping costs for all available countries, simply click on the link below the table. By doing so, you can download a file detailing the shipping costs for all the countries, as well as the shippers available.

3. General and personalised shipping costs
At Shopify, both the configuration of “General Shipping Costs” and “Personalised Shipping Costs” options allow you to set how shipping costs are managed for the products you sell in your online store. However, they have a slightly different focus and are useful in different situations. Let’s look at the difference between them:
In Shopify, you have two options for configuring shipping costs: “General Shipping Costs” and “Custom Shipping Costs.” These serve different purposes.
- General costs are the shipping fees that you will apply uniformly to all products in your store.
- On the other hand, if you prefer different shipping rates for specific products, you can create additional custom shipping profiles.
In both cases, you can configure one or multiple fixed or calculated rates based on the total order price, weight, geographic area, or other criteria.
The rates you set up will be displayed on the checkout stage of your store.
4. Configuring general shipping costs:
With the information provided in the table and the downloaded file, you will be ready to configure the shipping costs in your Shopify store.
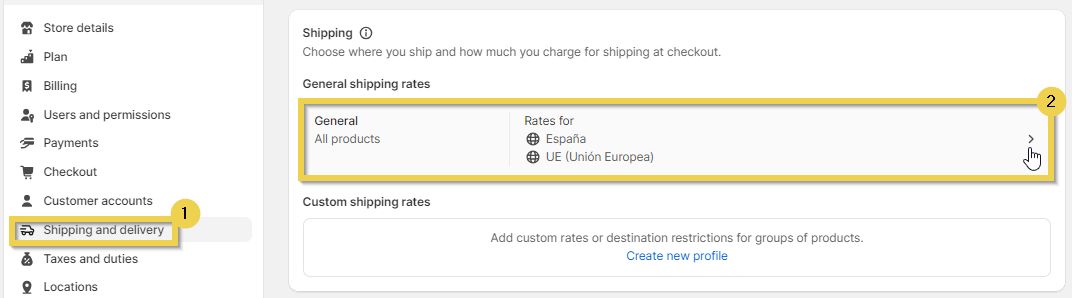
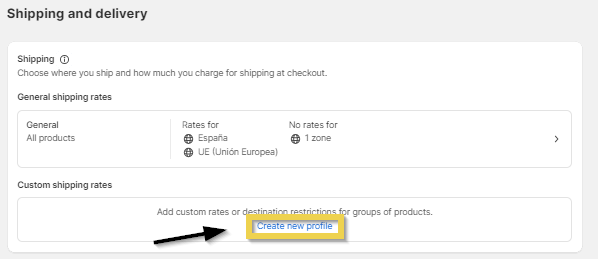
Start a session in your Shopify account and move down the menu on the left until you find the Configuration section. In this section, click on Shipping and Delivery.
Once on the Shipping and Delivery page, you will find all the options related to shipping on Shopify. To start configuring the shipping costs, click on the button in the general shipping tariffs.
Click on Create Zone to create a new shipping zone.

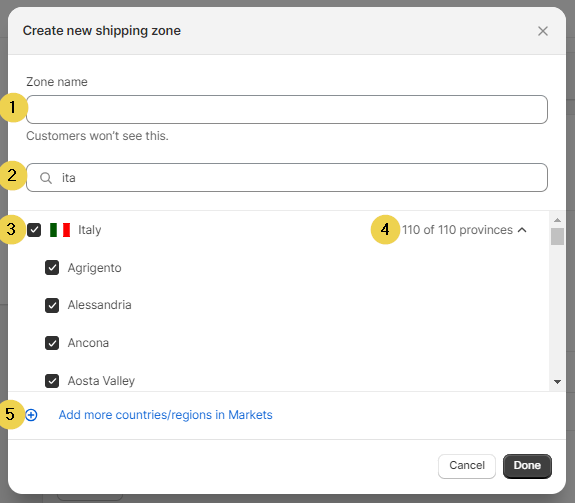
Within this option, you will see that you can:
- Give the zone a name (1);
- Use the magnifying glass to speed up your search (2);
- Add different countries (3);
- Select or deselect provinces within each country (4);
- Add more countries or regions (5).
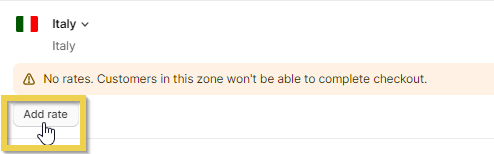
Click on Ready and once the zone is saved, go to Add Tariff.
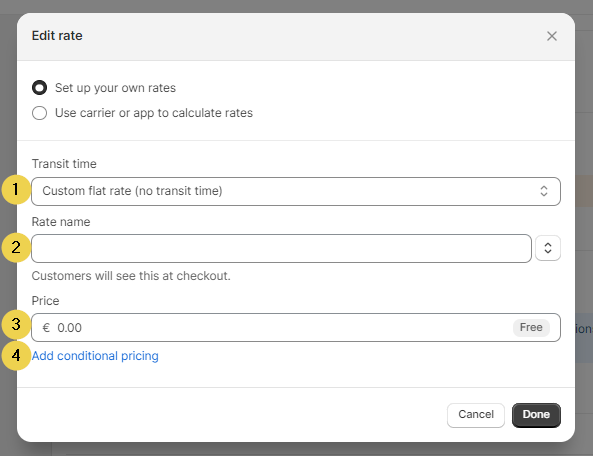
Personalise your tariffs by configuring:
- the transit time (we recommend that you select the Personalised flat rate tariff) (1);
- the tariff name (2);
- the price (3);
Then, click on Add conditions(4).
Depending on your requirements, configure your tariffs according to the weight of the item or according to the price of the order. We recommend selecting the first option.
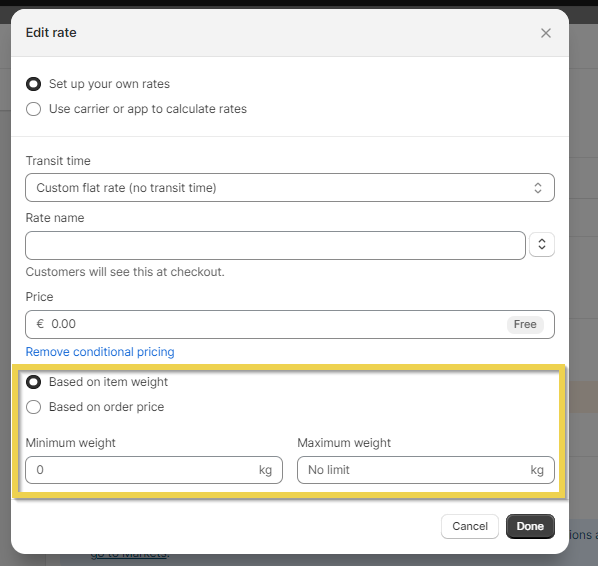
You can add rates based on weight segments, for example, 0-2 kg, 2-5 kg, etc. and apply the price for shipping cost on the orders made in your shop with a total weight included between the ranges configured for each shipping zone.We recommend that, as a minimum, you create the following weight ranges 0-2 kg, 2-5 kg, 5-10 kg, 10-20 kg, > 20 kg for each country you want to sell to and assign a price for each range. The more price ranges you create, the more accurate the rates you offer will be.
5. Configuring personalised shipping costs
Go to Shipping and Delivery and click on Create a New Profile within the Personalised Shipping Tariffs section.
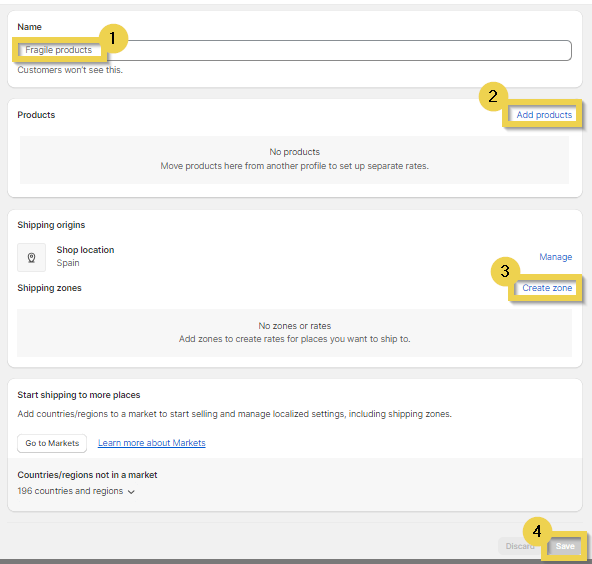
Once inside, configure your personalised shipping tariffs:
- Add a name to the tariffs.
- Create the shipping zones.
- When you have finished, save the changes.
6. Example for configuring shipping costs
Let’s configure a shipping cost for Peninsular Spain.
Looking at the data in the Multichannel table (which you will find at the start of this Academy), we can see that these are the shipping prices for this zone:
- Minimum price per kg: €0.30
- Maximum price per kg: €0.97
- Minimum price per order: €3.75
- Maximum price per order: €7.62
Example 1: For an order weighing 2 kg, the minimum shipping price according to kg would be €0.60 (2 * 0.30) and the maximum price would be €1.94 (2 * 0.97). However, we recommend setting the shipping price at €3.75, as this is the minimum price per order.
Example 2: For an order weighing 4 kg, the minimum price according to kg would be €1.20 (4 * 0.30) and the maximum price would be €3.88 (4 * 0.97), which is just a few centimes higher than the minimum shipping price per order. In this case, when setting the price in this category you can decide if you want to be more competitive or more profitable.
Remember that these are just examples and that you can adjust the countries, the weight categories and the shipping prices according to your requirements and sales strategy.
You should bear in mind that the shipping prices set are configured with VAT applied, since in BigBuy’s table of delivery costs, prices also appear with 21% VAT.
If you can’t find the information for a specific country in the information table on the Multi-Channel Integration Platform, you should review the shipping cost by carrying out a simulation on bigbuy.eu adding a product to the cart, a country and a postcode. The system will show you BigBuy’s shipping cost without taxes. You can also do this in the same way as we mentioned at the start of the post, by checking the file with the detailed information about the costs of all the carriers which you can download from BigBuy.
Now you’re ready to configure the shipping costs in your store and offer an optimal shopping experience to your customers all over the world.
If you want to automatically synchronise BigBuy shipping costs in your store, so you don’t have to configure them manually, you can do this through the BigBuy App. You can view the requirements in this academy and how to install it here.
When using the app function, your customers can also choose the shipper of their choice and view the price of each shipper.